Side Ruched Top

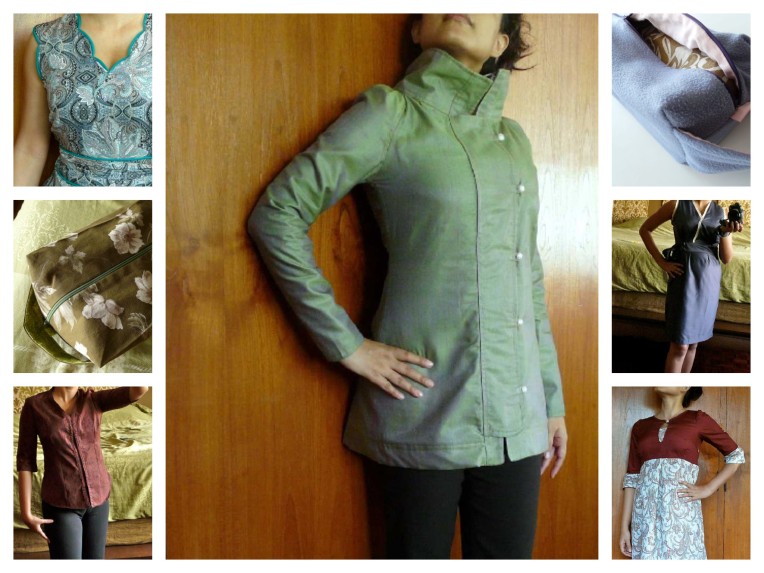
Here’s the second top I made using the sloper developed from a Craftsy class.

p1100192

I wrote previously what  a great moulage and sloper I derived from it, and my first garment. I used the same four classes:

1. The Bodice Sloper
2. Creative Darts and Seamlines
3. Creative Necklines
4. Creative Sleeves

Also, it’s amazing how Craftsy drops class prices to such fabulously low levels every few months!

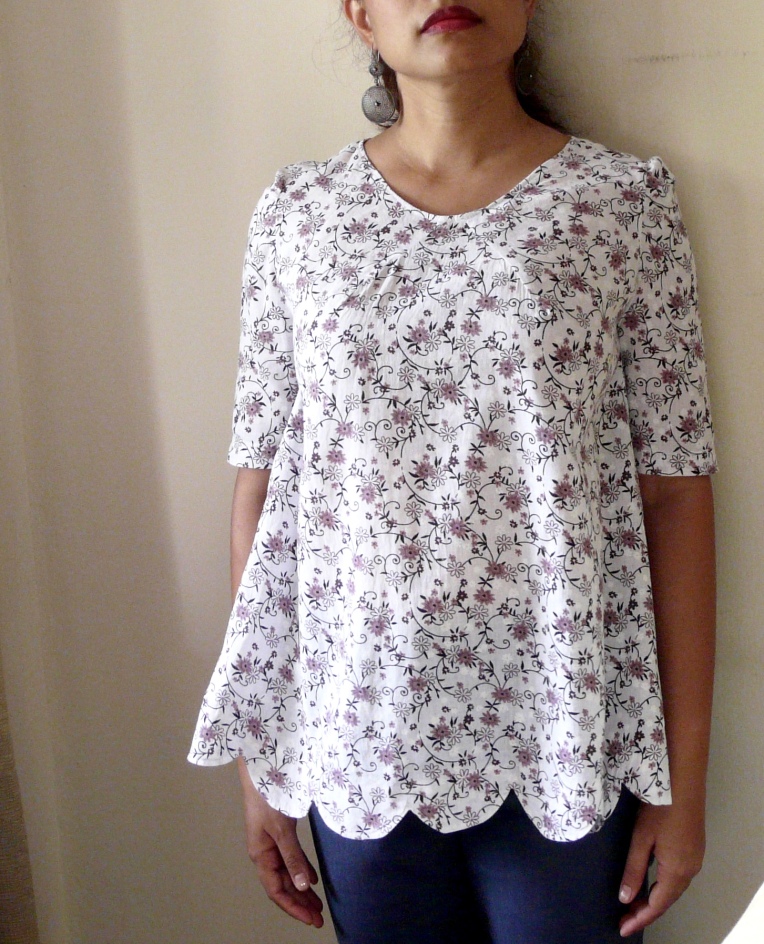
It is a lightweight cotton (I think from one of the giant fabric shops in Nehru Place, New Delhi). I rotated the shoulder, half armscye and side dart into the waist dart, but didn’t use the waist dart since I have a tummy and don’t like to be fitted in that area. Then I split open the (unused) waist dart, and inserted wedges in the outer leg so that it could be gathered back to fit the central leg. I’m a bit bummed that the gathering is kind of invisible in this print, but at least I know it works!

p1100199

I also curved out the bottom to look more like a shirt hem. Also, since I didn’t want to bother with openings, I added 1/4 inch to each side (adding 1 inch ease overall) at the narrowest part of the waist so I can pull it over my head. Without closures, it feels a little snug to pull on, but once on the body correctly, it fits beautifully.

On the back I kept both, the shoulder dart and the waist darts, and extended the shoulder by 1/16 inch, easing it to fit the front shoulder. This provides a nice fit through the torso as well as leaving room for arm movement in a sleeved garment. Because this is a little more fitted than the previous one, I had to account for the horizontal waist shaping dart on both back and front. Since there is no waist seam, I compensated it at the neckline (the class explains how to do that).

The sleeves are short, almost cap sleeves, with gathering at the head to echo the side gathers and scooped at the bottom. Instructions on how to make them from here. I probably should have done facings, but loathe them, so simply added bias facing at the neck.

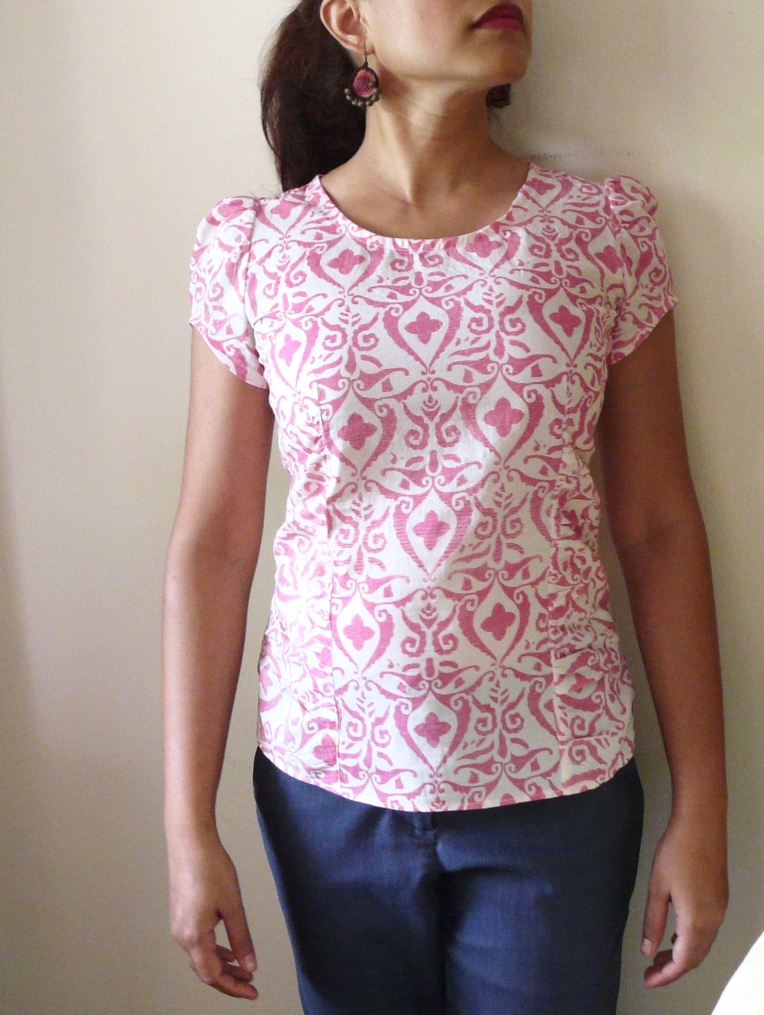
Now really, look at the fit on this one! I’m kind of stunned I made this, having been used to typical RTW fit, and lack of arm movement for so long! Even though it is a very simple top, it fits so beautifully! The only things I would change next time would be not to add a puff (in addition to the gathering) on top of the sleeve cap. And I should remember to centre prints.

Verdict: very happy! I think I’m actually gaining more confidence to use good fabrics from now on.


Scalloped Tunic

Here’s the first proper garment, made from my sloper! I used lessons from four Craftsy classes for this one:

1. The Bodice Sloper
2. Creative Darts and Seamlines
3. Creative Necklines
4. Creative Sleeves

p1100182

They are all by the super competent Suzy Furrer, and I’m pretty sure I got at least three of them at a 75% discount and one of them at a 50% discount. Excellent value for money!

The fabric is a thin summer cotton (probably from Nehru Place, New Delhi) and I followed  these instructions for the scallops. Seriously, the easiest scallops ever, without needing a million clips before turning.

In design choices, I rotated shoulder, half armscye and bust darts into a diagonal centre front dart (it’s a little invisible in this print, but you may be able to see an inverted V hanging off the neck at the centre front). I didn’t use the waist dart at all. It is fitted till just below the high figure point and then swings out. I calculated how much to add via insertions by seeing how wide the bottom needed to be, to fit in a whole number of scallops on the front and back. I think I went a little overboard though, and will take out two scallops from the whole circumference to recover it from maternity top territory. Luckily, this will be an easy adjustment, just a matter of bringing in side seams at the hem and blending to the existing seam at bust level.

The back has a shoulder dart (because it is sleeved), and the shoulder itself is extended by 1/16 inch and then eased to fit the front, to provide more room for movement in a sleeved garment. I omitted all other darts, and ignored the horizontal waist shaping on both front and back. I didn’t even compensate for ignoring it at the neckline, since it is a loose-fitting garment.

Guys, I am super pleased with this! I am planning to make a series of very simple tops, trying out a couple of new techniques in each. Nothing spectacular, but good enough to lounge at home or walk the dog. I kept this one deliberately loose at the bottom so I wouldn’t have to bother with closures, but it is intended to be well fitted from the full bust upwards. And it is! And look at that sleeve — it is the first draft, calculated off my garment sloper, but no drag lines! I think the sleeve cap could stand to be s-l-i-g-h-t-l-y less puffy, but that is the only fault I can find with it. Everything is well fitted, and yet arm movement is easy. I’m hooked!

I’m planning to make a few of these casual things to perfect the fit, trying new shaping methods and sleeves, before venturing into my expensive fabrics. For my next top, I’m going to keep the waist more fitted.

Verdict: very happy with this nice little tunic!

Pink Gold Print

I have great envy of people who can come up with snappy names for their projects. I’m just too literal minded… sigh! Therefore, I present: Pink-print-diagonal-empire-top, known as PPDEP to her intimates, for your viewing pleasure.

Front

I’m quite happy with this one, since I managed to get the diagonal empire waist (is there a technical term for this?) at exactly the right height. After some futzing around (through previous, unblogged, very unflattering projects), I’ve discovered the most flattering empire line for me is slightly above the underbust. Otherwise, at the exact underbust level, it looks just too Roman-Matron-Off-To-The-Gladiator-Pits-For-Elegant-Afternoon-Entertainment on me.

PPDEP is also based on the heavily, heavily, tweaked Sew U block. I chopped out the diagonal waistband and cut four pieces out of that piece (two mirrored sets). One for the outside, one for the inside. The ‘skirt’ of the front was cut along the fold, and darts from the original block retained. The front bodice required a bit more thought. I rotated the side dart out into gathers towards the bottom. Then cut a gently curving V neck. And finally, added button bands. The buttonbands and neck were finished with this tutorial (so brilliant!), just as in my navy flowers blouse. Then I overlapped the buttonbands, and sewed them to the diagonal empire waist-band. Pretty little wooden buttons:

buttons

The sleeves have a side split and are three-quarter length. PPDEP’s block is quite well fitted, so much to my disappointment I couldn’t quite pull on her over my head. Instead of subjecting her to violent tugging at each wear, I added an invisible zip at the side. So here we are, another nice little summer top! In rich glowing pink with gold block printing! It’s a regular soft cotton fabric, the sort that floods the local market every summer for people to snap up and run to the family tailor to update their summer wardrobe. I used less than 2m, but didn’t track the yardage exactly.

fabric

Also, this is probably my longest blogging break ever? I had this post written and uploaded, photos taken and filed; all I needed to do upload photos and publish. But the last 20 days have been mind-bogglingly busy for me (in very good ways) and so… no time to blog. I was even too tired to knit! What has everyone else been up to?

Botanical Labours

I made another Taffy Blouse. Nothing much to say, it’s a nice little pattern and fits well.

small

Pattern: Taffy Blouse from Colette Sewing Handbook

Fabric: Botanical print fine cotton for everything, including self bias bindings. Unlike my previous Taffy with viscose, the cotton wasn’t such a pain to cut. I laid the fabric flat, laid pattern pieces on it, marked around, then flipped the half piece to mark the other side, and nothing slid around.

Pattern Changes: Moved up location of ties. For the next iteration, I may move them even further up, close to underbust level. Bias tape used was 1 ½” wide before any folding.

Size: I went with 0, since that seems to fit my frame best. If I had chosen the recommended size, I would have had to pick 4 or 6.

Garment: I like it, will probably make more. I’m trying to find a good combination of sheer and solid fabrics, so I can attach the solid as an integrated slip.

Also in repetitive projects, I made another Baby Berry Hat, with little purl bumps to simulate strawberry ‘seeds’. Whenever I offer to make hats for friend’s children, I give them a choice of patterns I’d be happy to make. Besides the hat above, I give an option for a lovely lacy child’s bonnet and an adorable little stranded cap. Without fail, parents always choose the Baby Berry – they cannot resist the urge to see their children as edible little fruit! There’s got to be a Freudian analysis of that!

IMG_0342

A Slew of Laurels

Months and months ago, I made a Laurel muslin. I realized it is a basic kurti pattern and then used it to better fit some of my RTW kurtis. I generally manage to find RTW kurtas my size, except for handicrafts selections – there you’re paying for the gorgeous hand-woven textile or  exquisite embroidery, not so much for the cut and fit. So they end up being decidedly matronly off the rack.

I cut the sleeves off the matronly kurtas and separated the front and back. Then I positoned the Laurel pattern fetchingly on the embroidery, cut the pieces out and sewed them up. Instantly wearable!

The Laurel pattern drafting is excellent and fits my shape perfectly. The back was a tiny bit wide, though, so I just removed 1cm wide vertical sections from each half back piece, then redrew the neck curve smooth. Also, after making the muslin, I realized I didn’t really need a closure, so cut the back in one piece for all the rest (eliminating seam allowances).

1. The (Wearable) Muslin
Made with some cotton mix. Please excuse the fitting wrinkles:

full small

I scooped out the neck and finished it with i-cord…

icord small

… and the hems and sleeves with bias tape:

small hem

I also changed the back zip to a lapped construction. I can’t remember which tutorial I used, but there are tons online if you google “lapped zipper”. Innit lovely?!

small zip

2. The Green Alteration
Here’s the Before (awful low light pic, but gives an idea of the general shape!):

small before green

And the After; so much more wearable!

small after green

3. The White Alteration
(No Before photograph. I kept the original crochet sleeves)

small white after

4. The Diagonal Adventure
This fabric had diagonal pin-tucks stitched into it, giving it an unexpected stretchiness. It felt bias cut, although it is cut on the straight grain. I cut the back and front in halves. Of course I had to flip the pieces horizontally to do that, but I also flipped them vertically at the same to get chevrons.

small Diagonal laurel

Since I couldn’t add back darts to this fabric, I shaped the back waist curve by removing fabric at the centre-back seam. The edges have lace and bias binding finishing. I cut a v-neck and scooped the bottom into a U shape.

Having established that the Laurel pattern could be used for casual daytime tops / kurtis, I’m planning something slightly more complicated for the future. Let’s see!

Border Print Taffy

Finally reunited with my sewing machine after months of travel, I set about making myself a quick garment. Hah! I should have just made more Myrtle Bags!

My  first project out of the Collette Sewing Handbook was the Taffy blouse.

Front full

I had this really pretty border print viscose:

Print

It’s deliciously cool against the skin, light and breathable. But … it is also rather loosely woven and combined with the bias cut pattern the whole process was one that leads to hair rending and cursing. I don’t care if I have to boil rice to make my own starch next time, I WILL USE STABILIZER the next time! Apologies for the yelling, but I hope my shouts echo through time to my own ears when I next decide to make a bias cut pattern out of loosely woven fabric.

On to the process.

Size: I cut a size 0 with no changes, and it fit very well. As with all garments, the key is to get the shoulder to fit and lie correctly against the body. If I had gone by bust size, I would have cut size 4 and wept as it slipped off my shoulders.

Pattern changes: I wondered if I would need to change the sleeves, making them longer and less circular. However, I really liked how the sleeves came out, so no changes there. I will move up the tie position by a couple of inches the next time.  

Cutting: Awful. I WILL USE STABILIZER next time. I positioned the body pieces on the centre of the fabric and used the border print on one side for the sleeves. I used up the remaining border on the other side to make continuous bias tape.

Tip: although making one inch wide tape to get ¼ inch tape is generally a good plan, in loosely woven fabric like this the tape thins out leaving a frustratingly narrow width of ¾ inch. So unless I use a tight, crisp woven the next time, I’ll mark lines 1.5 inches apart the next time, just to have enough width to work with.

Sewing: Pretty straightforward, because the lines of this top are very simple. I may finish the sleeve edges with my picot foot the next time. I did try to gather the front neck slightly, but after attaching the binding around the neck, the gathers pressed out. Such is the weird magic of bias cuts!

Since the ties were positioned too low for my preference, instead of ripping out the side seam I just sewed them along the outside of the seam to their new position. Oh and I hung the garment after sewing it together (before hemming), not after cutting the pieces.

The sleeves are bound with self fabric:

sleeves

As is the neck:

Neck

On the bottom I tried my picot foot. It bound it neatly, but also made the edge r-e-a-l-l-y flare out. I’m undecided if I like the ruffly lettuce look or whether I should just trim it off and stitch a regular hem.

Picot

Garment: I like! It’s pretty and wearable. I would definitely want a very pretty, sheer one next time, perhaps lined and edged with charmeuse in the same colour.

Also, I’m most probably mid-air right now, so this post is being brought to you by the magic of Scheduled Posting. Replies to questions will appear only when I’m next near an internet connection!

Sew Ends 2013!

I managed a decent amount, although nowhere near the prolific levels of my knitting. And that’s because I was away from my machine for months at a time!

The undoubted star of my 2013 sewing has to be my Minoru! Here it is, centre stage:

Sewing collage 2013

Column 1: Paisley Back Wrap, Truly Myrtle Bag, Banana Republic Shirt
Column 2: Minoru!
Column 3: Truly Myrtle Bag, Navy and Lace dress, Laurel (unblogged)
Column 4: (Invisible, since unphotographable, since in another country): Two tunic length Laurel kurtis, sleeveless top.

In terms of usability, the two Truly Myrtle bags get used a lot, and the Paisley dress comes out quite often too. As do the sadly unavailable-for-photography kurtis  I made with the Laurel pattern because the original RTW pieces were too big to simply adjust for size. So I just laid the Laurel pattern over the giant sized RTW garments and cut out the pattern, positioning the embroidery flatteringly. The red/print Laurel hack (bottom right) is a bit too puffy at the empire waist and I may topstitch the pleats to move it into wearable rotation.

That’s all for the 2013 roundup! I was absolutely going to post this in December, but then spent the last 10 days touring a half excavated, once fabulously rich medieval city (Persian, Chinese and Italian travelers describe its markets filled with gold, diamonds and rubies; dancers with arms so laden with gold that they had to be supported by servants; sandalwood palaces and parties that went on for days); and then savouring Indo-French fusion food in the utterly charming maisons and villas of Pondicherry.

Thank you for reading, commenting, pinning and liking… you’ve made it worthwhile! I hope you all had a very happy start to the new year, and may 2014 bring you every happiness!

13-ish in ’13

13 in ’13! And 11 of them new projects started in this year, with only two of them WIPs carried over from last year! And this is without going on a knitting hyperdrive or taking leave from work to knit. In fact, I had fewer holidays than last year, and sometimes weeks went by without picking up the needles. 13 Sweaters made through after-work knitting, a couple of hours on weekend days.

Collage 1

Collage 2

Collage 3

Top: Nanook, Annis Shrug, Delysia
Second:    Ginger Lizette, Cranberry NectarTiger Whisperer
Third:   Aidez Beatnik Hoodie,  George St Pullover
Fourth: Charcoal DahliaKouklaAdriatic
Last: Rosamund’s Cardigan

So I thought about how I managed to do it. Were there Significant Life Lessons here? You decide, dear readers.

Decide to do it. I’ve made similar decisions in the past, but this time it worked. Perhaps I kept the decision at the top of my mind more often?

Be inspired. Before knowing about the knitting explosion on the internet, I would have thought churning out one sweater per year a pretty good goal. Seeing other, regular, people churn out sweaters every week or ten days sets the bar higher. Your brain starts seeing it as something possible, desirable and even doable. Once your brain accepts that a goal requires no special skill or perfect timing to get something done, it just goes ahead and does it.

Don’t compare. On the other hand, seeing people churn out a new sweater a week can be a source of despair! I was careful not to compare my own pace with any other person’s. Whatever worked was fine for me.

The two preceding paragraphs sound contradictory; a delicate balance is required. Turn off comparisons if they drain you, and only look to others as long as it serves as a healthy sort of inspiration. I would start checking other people’s completed sweaters on Ravelry only when I finished one of my own, or to top up flagging levels of my sweater greed, just for the feeling of belonging to an achievers’ club.

Pick your own pace. This was really important to me. I used to belong to a group on Ravelry which aimed to do a project, any project, each month. Although it was great fun and the organizers really put a lot of effort into the theme, after a while I started feeling a great sense of dissatisfaction and stress, because it didn’t mesh with my style of knitting. I like making large stuff, and it really annoyed me to make tiddly little things just to finish them within a month. Also, having to wait till the start of the next month, grrrrr!

So then I joined the IntSweMoDo group which was perfect! Aim to make one sweater a month at your own pace, starting and ending whenever. Sweaters, not egg cozies! Complete freedom of starting and ending time! Lavish praise when a sweater was finished! Perfect!

This freedom was particularly important to me because knitting very much occupies a ‘Do Whatever I Want’ space in my mind, as opposed to work where we are subjected to the tugs of what feels like millions of factions. I enjoy my work, which is a cause dear to my heart and has us conduct large, international, activities. But it also involves coordination with governments, donors, partners; requires constant checking to make sure everybody is mostly satisfied and nobody is offended; and is the sort of work which by definition can never come to a definite end. On good days it feels intricate and exhilarating, with a finger on the pulse of the world. On bad days it is wretchedly exhausting. So, monthly knitting goals would just be… NO. A loose and non-enforceable goal of 13 in 13, if I wanted to, was perfect.

Set things up to be easy. My multi-project harem system really worked. The most tedious tasks of any project are swatching, calculating, casting on. Decisions take time. So I would finish all the tedious work for a batch of projects in one go, and just enjoy soothing knitting for the next few months. This really helped with after-work knitting when brains were just too fried to think about anything.

Remember. In all this, I remind myself that knitting is something I want to do and can stop any time 🙂

So… you’ll notice I said 13-ish in ’13, and that’s because the last project is still incomplete (and I may only get 95% done by the end of the year). But WordPress reminded me this is my 100th post, so I wanted it to be Significant in some way.

Next year… I’ll start on the smaller stuff. I love making sweaters, but I do need cowls and hats and gloves, and have a few good patterns languishing in my queue for years. Perhaps 14 in 14 may work, mostly knitting small stuff?  This is dangerous ground; the secret of success is to know the value of restraint.

Cranberry Nectar

P1050551

The third Cascade Ultra Pima FO, in so many months! I love this yarn: so smooth, shiny and — miraculously for cotton — non-painful to knit. I want to make so many pretty summer tops, some pale, some vibrant: The Twist Front, Lotus Blossom, Flutter Sleeve and Petal Halter!

Today’s FO is in a ripe and juicy colour, “Cranberry”. I loved the cable panel and square neck of Ambrosia, but who on earth wears a summer top cut so deep that one needs a t-shirt underneath? Also, this kind of vertical opening looks really cute buttoned up the middle with the top and bottom casually left open — but then again, the snug fit means ugly gaping buttonbands. Brainwave: work back and forth at the bottom, then in the round for the ‘buttoned up’ torso section, then back and forth again at the top!

Once that was decided, I just plugged in my numbers from the Delysia camisole and made this bottom up since I find it much easier to fit that way. Also added polished turned hems and cuffs, and took out the waist ribbing, which is not only very unnecessary but also disrupts the smooth lines of this lovely pattern.

P1050557

Specs

Pattern: Ambrosia in Interweave Knits Summer 2010

Yarn: Cascade Ultra Pima; 100% cotton; 100g = 201m; “Cranberry”; dk wt; 3.75 skeins

Needles: 3.5mm