Right, let’s do a quick tutorial on adding inseam pockets to your knitting.
I love adding pockets to all my knits because really, what’s the point of a cozy cardigan which leaves your hands cold? One of the greatest joys of being snuggly warm is to push your hands into pockets and a sad majority of patterns deprive us of that joy. However, pockets are really easy to add! Patch pockets, obviously, would be the easiest, but vertical inseam ones aren’t difficult at all. Remember, in knitting, we create the fabric, and can manipulate that creation in any direction we see fit.
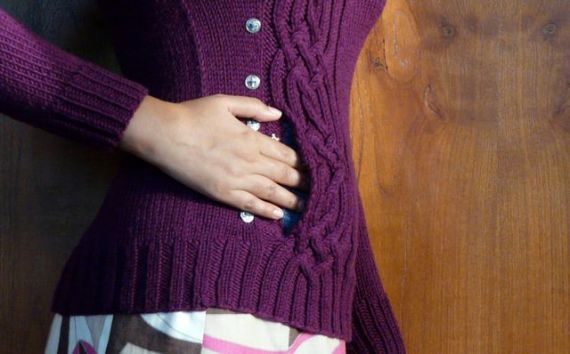
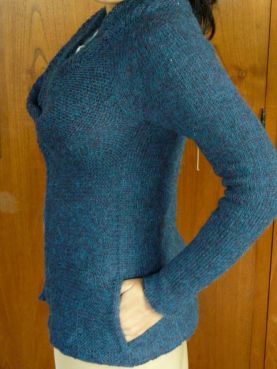
Let’s start! I’ll be talking about creating generic pockets, and noting differences for specific cases. The finished pockets are from two previous sweaters while the instructions are from a WIP. Since these were taken in real time, some of them required manipulation to negate effects of evening lighting… in other words, they are washed out.
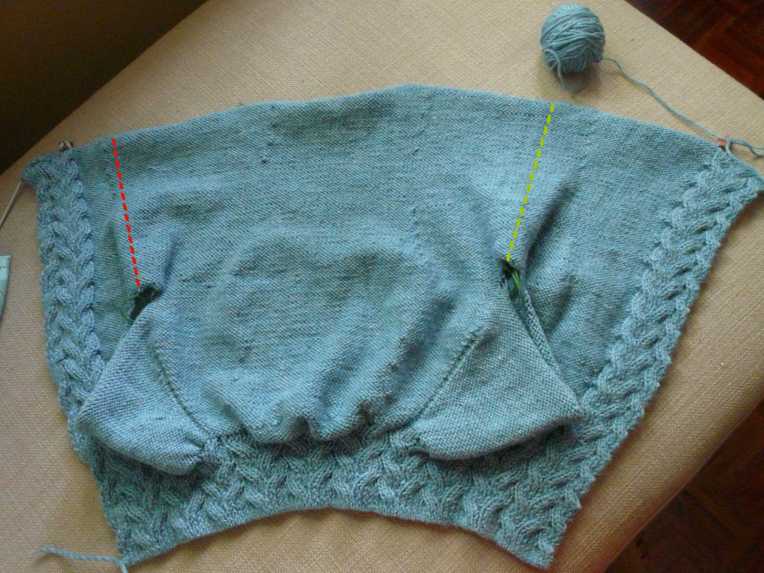
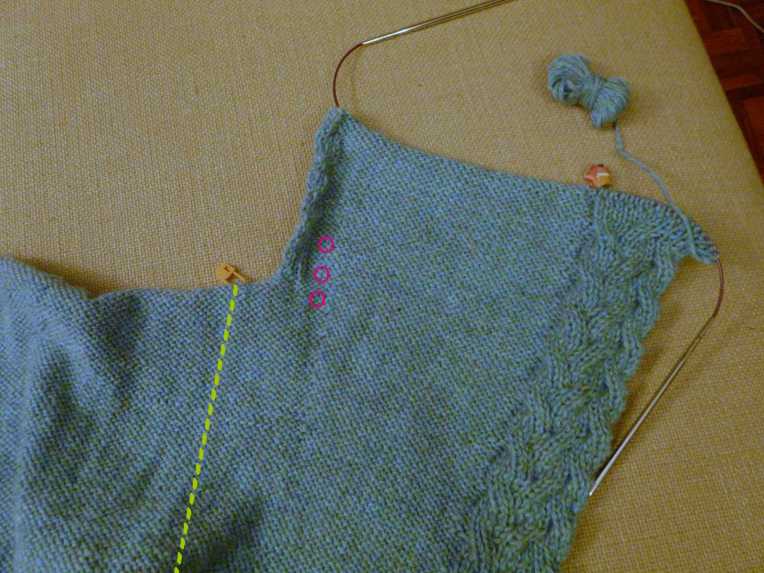
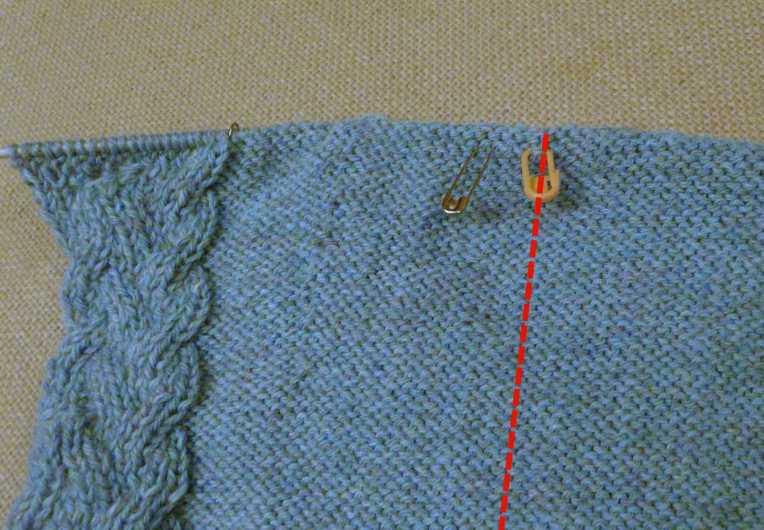
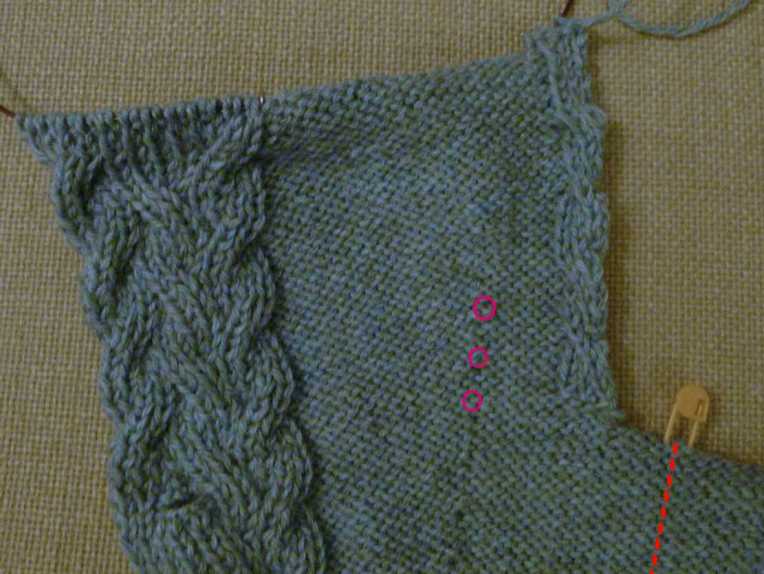
1. First, orient yourself. I’m knitting this cardigan top-down, so when it is laid on the floor with the live stitches furthest away from me, the neck of the cardigan is nearest my feet. The dashed lines divide the cardigan into three sections: to the right of the green line is the Left Front (LF), as worn; to the left of the red line is the Right Front (RF) as worn; between the two lines is the Back. If you were working the cardigan bottom up, the RF would be to your right and LF to the left when laid on the floor. Remember that difference, and you can use this tutorial for bottom-up cardigans as well.
2. Work up to the row where you want the pocket openings to begin. End on a WS row. You are now about to start a RS row, with the yarn to the extreme right of the work. Important: my cardigan has reverse stocking stitch on the RS, so keep that in mind when you look at these pictures.
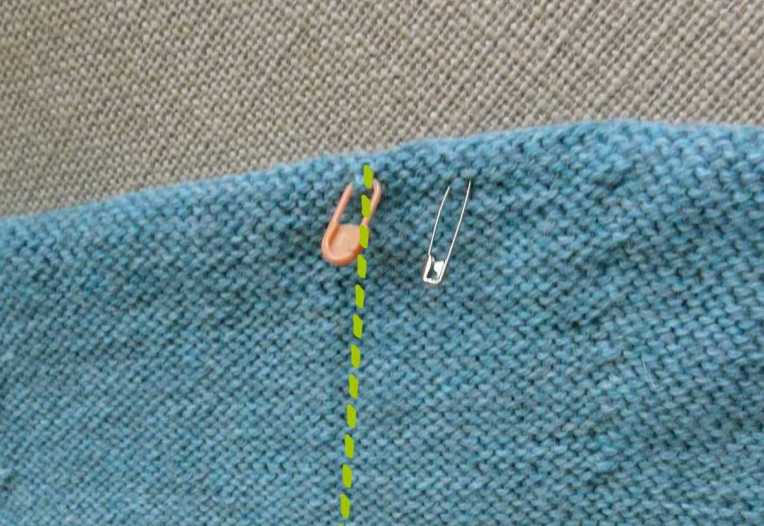
3. Mark the LF pocket opening. The orange marker is at the side ‘seam’. I like to orient pocket openings slightly forward (so that my elbows are not skewed out when shoving hands into pockets). The metal safety pin marks the pocket opening column, about an inch towards the front from the ‘seam’ column.
4. Work up to 3 sts before the pocket opening marker (metal safety pin). On the next three sts, kfb into each stitch. Why? We want to create a stable edge for the vertical opening, and stockinette would curl. So we are going to create a 1×1 rib on the last 6 stitches, where the purls will recede completely to make the edge look like regular stockinette. To avoid scrunching the fabric, we add 3 sts along the opening via the kfb’s. So the last 6 stitches (3 original stitches, 3 just created with kfb’s) will form the 1×1 rib edge.
5. From this point on, work only the LF. Along the pocket opening edge, work the last 6 sts in 1×1 rib. Don’t forget any shaping and patterning required along the LF!
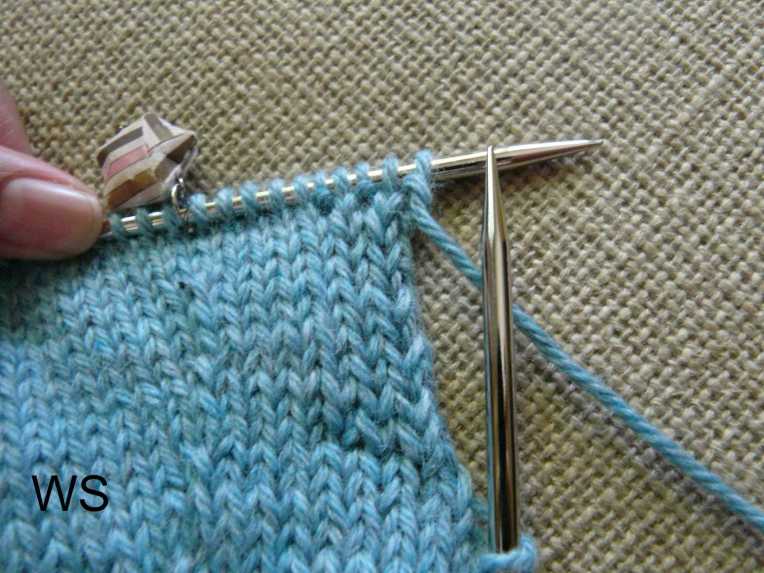
On the stockinette side your ribbing will look like uncurling stockinette:
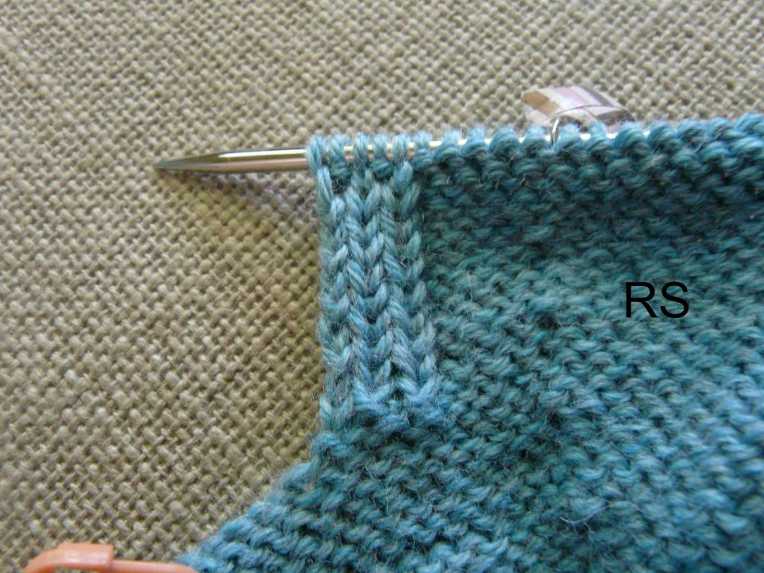
On the reverse stockinette side the ribbing will look like three columns of uncurling stockinette:
Usually, the stockinette is the RS so you would continue in this way, creating a pocket opening edge which blends in beautifully with the rest of the fabric. However, since my RS is reverse stockinette and the knit stitches of the ribbing will be visible, I’m adding a cable twist to them to match the front-bands.
6. Work as established till the pocket opening is as long as you want it, minus two rows, ending with a WS row. Count the number of rows you have worked so far (X). On the next row, work to last six stitches, then work two stitches together three times. If stockinette were your right side, you would k2tog x 3. Since reverse stockinette is my right side, I did p2tog x 3. Your stitch count along the pocket opening is now back to what it was originally.
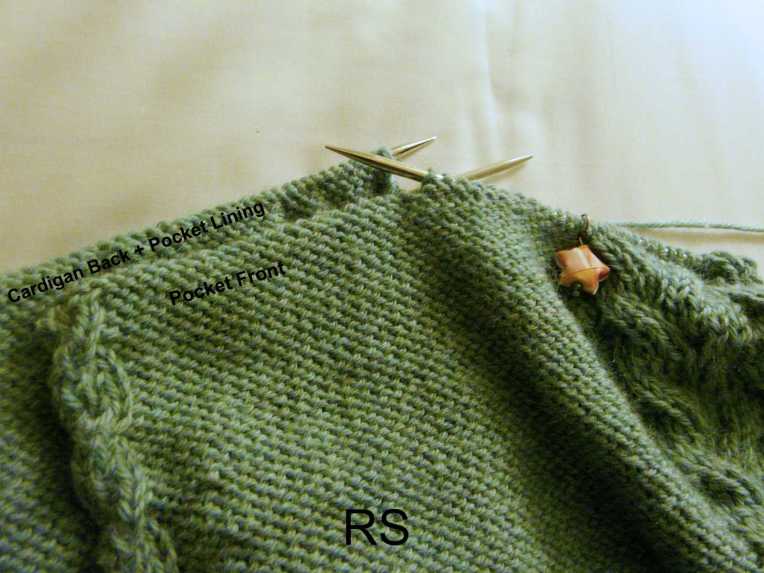
7. Work a WS row. When you orient the cardigan as in the first picture, the LF is longer than the other two sections and the yarn is once again at the extreme right of the work. Pink circles show the continuing hip shaping on the LF piece. Do not cut the yarn.
8. Now do the same on the other side. Mark the side ‘seam’ and the actual pocket opening an inch towards the front. The orange marker is at the ‘seam’ and the metal safety pin is at the pocket opening column. Place the RF stitches on a new working needle, with its tip at the pocket opening.
9. With a new yarn end, start at the pocket opening. Kfb into 3 stitches at the opening, then work the rest of the RF.
10. Continue as before, working the 6 edge stitches in 1×1 rib and doing all shaping and patterning required on the rest of the piece till X rows have been worked, ending with a WS.
11. On the next row, work two together three times as before to decrease the extra stitches at pocket opening edge. Work one more row, ending with the yarn to the right of the RF section. Cut the yarn.
12. Now we will work the back section and pocket linings at the same time. The generic instructions would be: with a new yarn end, pick up stitches for the lining from the WS, work across the Back, pick up stitches for the other pocket lining. But let’s look at these instructions in a little more detail.
a) Pick up stitches
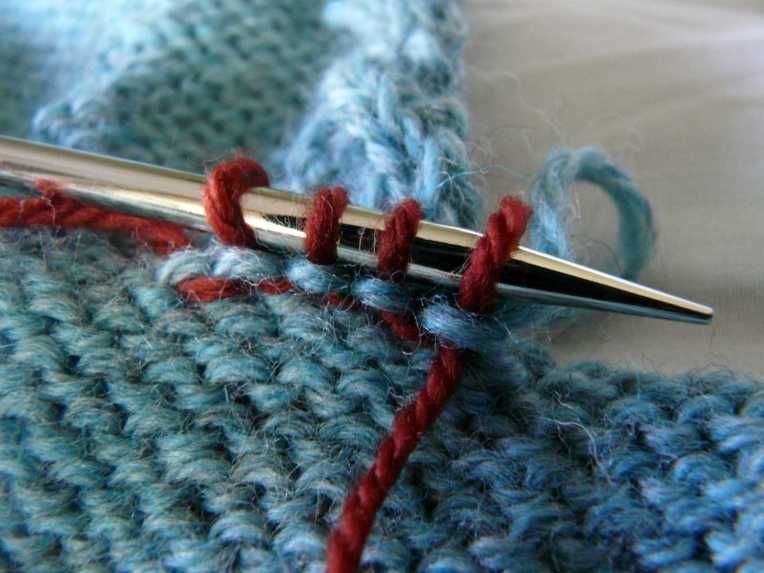
Suppose you were using the stockinette side as your RS and the reverse stockinette as your WS, as usual. On the WS, locate the row of purl bumps just below the live stitches of the Back. Follow that row into the LF, then pick up loops through those bumps:
Work across the live stitches of the Back:
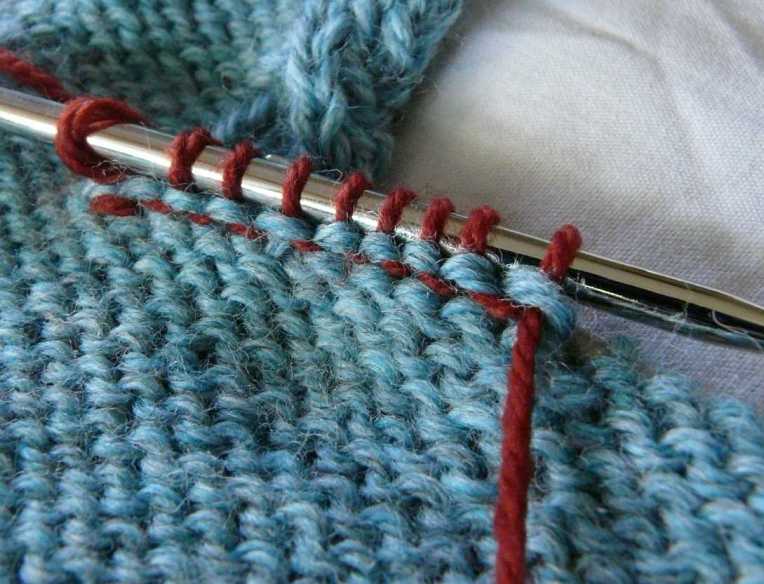
… And then pick up stitches from the RF. The photo demonstrates with red yarn for clarity; you would use your project yarn.
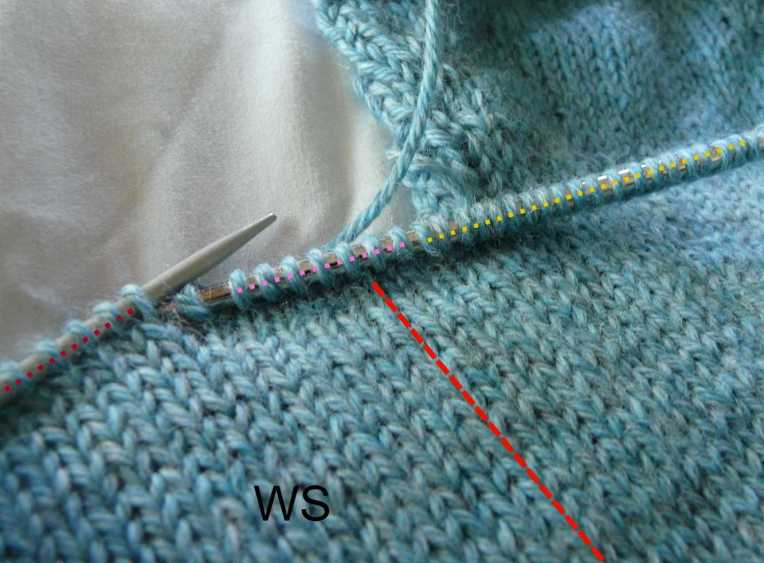
However, the reverse stockinette side is my right side, so I certainly cannot pick up the lining there! Instead, I cast on stitches for the first lining, knit across live stitches, then cast on stitches for the other lining. Yellow dots are cast on stitches for right pocket lining, pink dots are stitches worked across held Back stitches, red dots are remaining Back stitches waiting to be worked. After those are done, I would cast on more stitches for the left pocket lining. The cast on edge will be sewed down later.
b) Number of stitches: the number of stitches to be picked up or cast on should normally be as wide you want the pocket lining to be. However, if you’re not sure you have enough yarn, or you’re using really bulky yarn, you can pick up or cast on about an inch worth of stitches and work rest of the lining later.
Let’s call the number of stitches you cast on, or picked up, Y.
13. Work for X+2 rows, not forgetting any shaping, ending with a WS row. Cut the yarn.
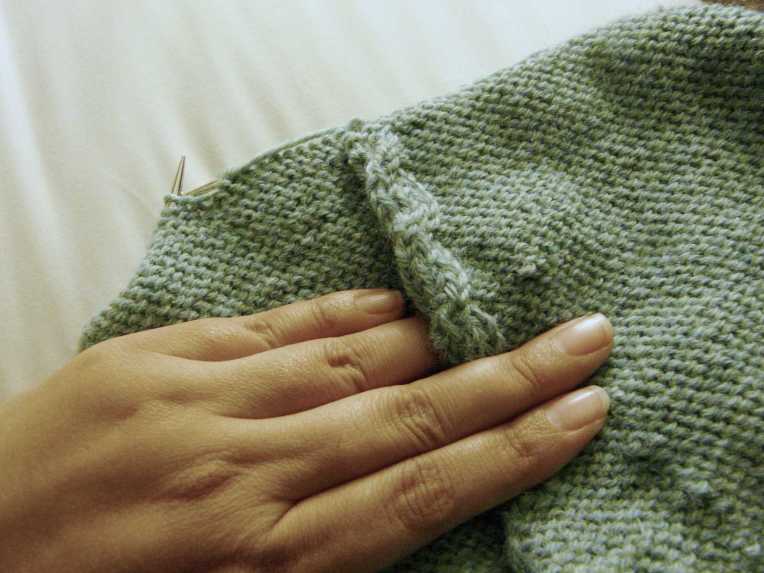
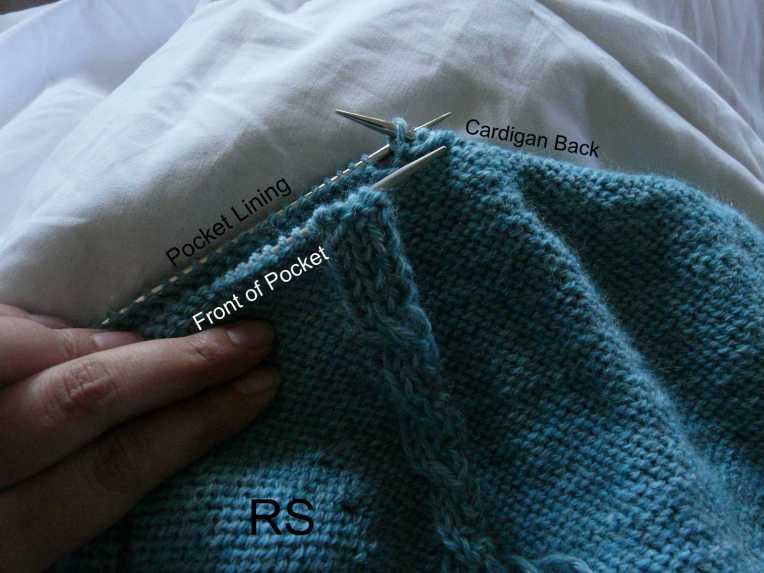
14. Join everything together: Using the attached yarn from Step 7, work across the LF till Y stitches are left. Hold the lining stitches behind the remaining LF stitches…
… and work two stitches together, one from each needle, to join.
Continue till LF stitches are over. Work across back till Y stitches are left. Holding the lining behind the RF, work two together, one from each needle, till back stitches are over:
Continue working remaining RF stitches.
15. Work the rest of the cardigan as in pattern.
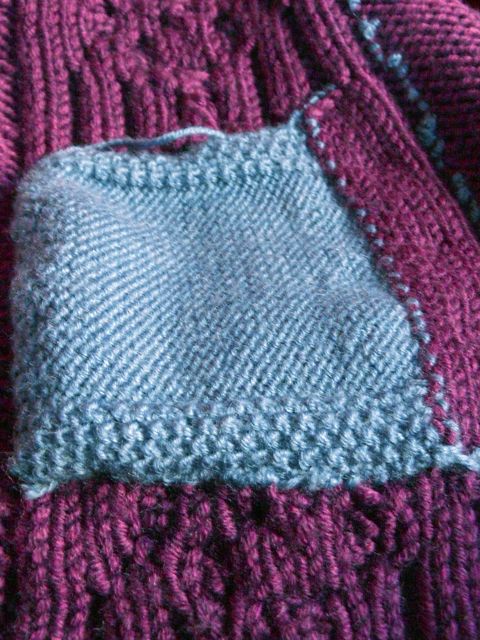
16. To finish, sew up all open edges along the pocket linings. If you chose to work linings for only an inch (like the second option in Step 12.b), first pick up stitches along the vertical edge of the lining with a thinner yarn, work the rest of the lining, then sew everything down. It should look like this:
That’s from a sweater, where I cast on about an inch of stitches for the linings in the main yarn (purple). After knitting the sweater, I used a thinner yarn (grey) to pick up stitches along the vertical edge of the lining, worked the rest of the lining, and sewed everything down.
And there you have it: lovely inseam pockets!


I’m definitely going to try this next time I knit a jumper. What an interesting tutorial, I love the way you think about garment construction. It’s inspirational.
Thanks for the great tutorial! My only question is how do you sew the sleeves in without it showing through on the right side of the sweater
Hi Heather,
I’m following standard top-down raglan construction where live sleeve stitches are left on yarn scraps while the body is worked. Afterwards, the live stitches will just be knitted down to the cuffs, so there isn’t any sewing to do.
This is a great tutorial but I have a few questions: Do I need to put the live stitches from the back and right front onto scrap yarn or a holder while I work the left front pocket? Or, do I need to switch needles to work the left front pocket? Thanks. Paula
Hi Paula,
I usually make my cardigans on a really long circular needle (working back and forth), so a bit of cord manipulation allows me to work the inseam pockets on one side, while holding the Back and the other side, on the same needle.
However, to make it easy for yourself you could certainly hold the unused stitches on a scrap yarn or spare needle.
Thanks so much for your response. My project is a cardigan for a 3 year old boy and I think they need pockets to put stuff in, rocks, sticks, cars and trucks. I used scrap yarn and it worked perfectly. I feel so clever. Thanks again. Paula
Thank you so much! These are fantastic instructions, which I have just used to great success.
Great! So glad you found them useful!
Reblogged this on knit1knitall and commented:
IN-SEAM VERTICAL POCKETS