L, Not-So-B, D

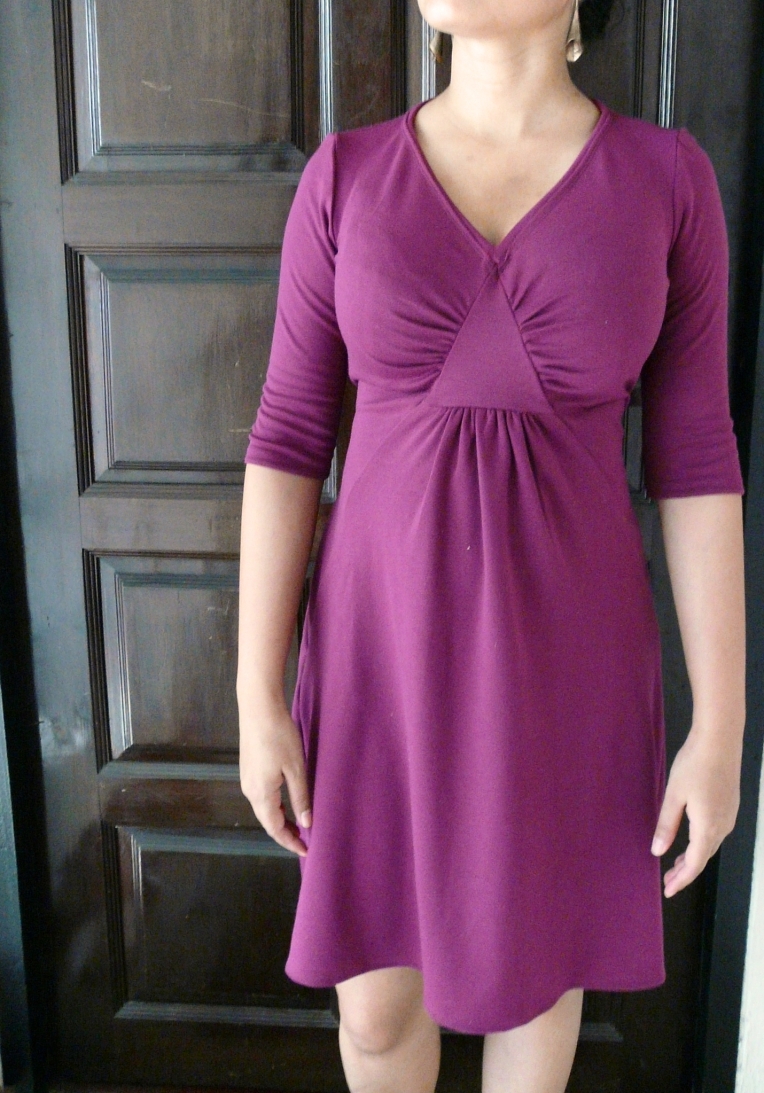
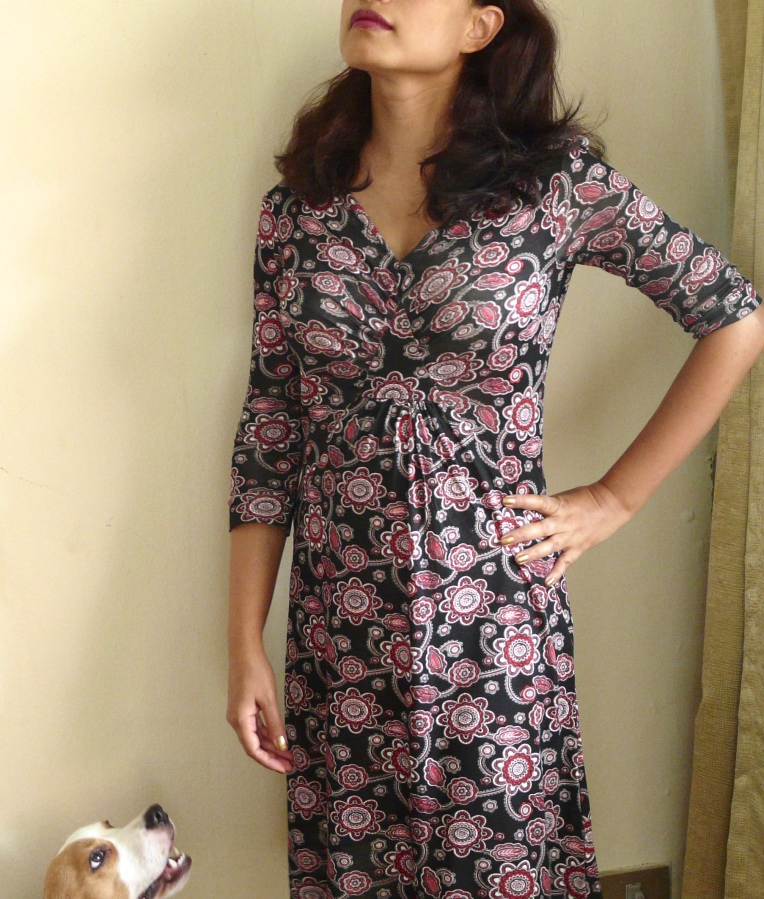
Another Muse Natalie. I love this pattern!

P1100141

I confess to being the sort of person who hates those “10 Things a Woman Must Have” type lists. Although I love looking at pictures of capsule wardrobes for a specific reason (winter business travel, summer beach, etc), the idea that all women, in their daily lives, have to have a certain set of clothes really annoys me. And especially when these typical lists are so soul-suckingly boring (LBD, white button down, striped T-shirt, blah blah blah).

So if I have to sew a D, it cannot be fully B, and, as it turned out, it’s not so very L either.

I increased the length of the centre front skirt so as to keep the hem straight, but made no other changes. The centre triangle is basted to a woven material (not interfaced) for stiffness. And I hand-sewed on a matching triangle on the WS to hide all the seams. I also had to hand stitch the neck binding on the reverse side after attaching it by machine. Any attempt to machine stitch the binding to the WS resulted in a horribly wavy neckline. Probably because my jersey fabric was so thin!

P1100145

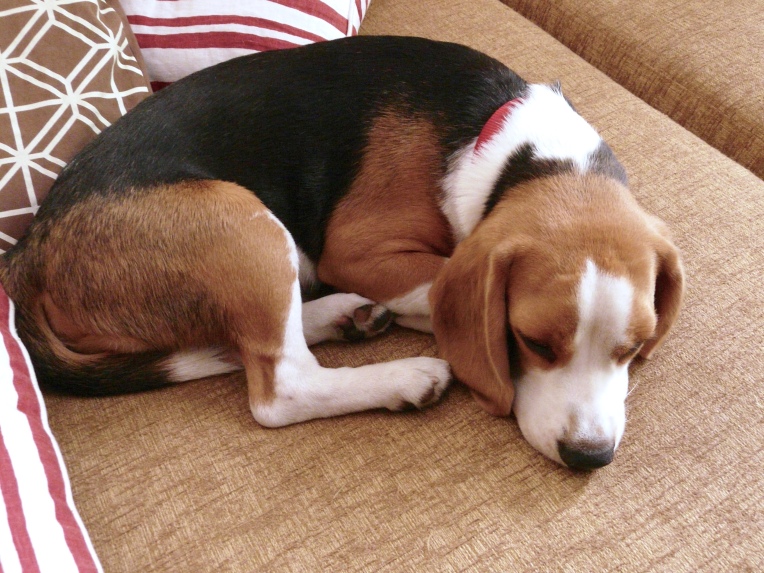
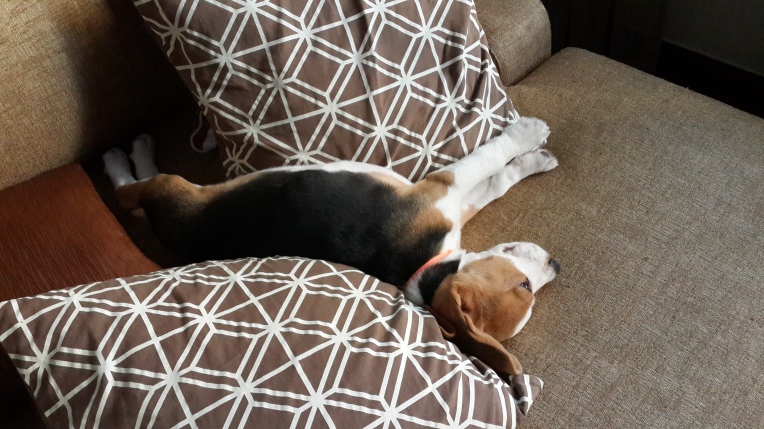
Nothing more to say — I like it as much as my  first one, despite obligatory photobombing by the Creature!

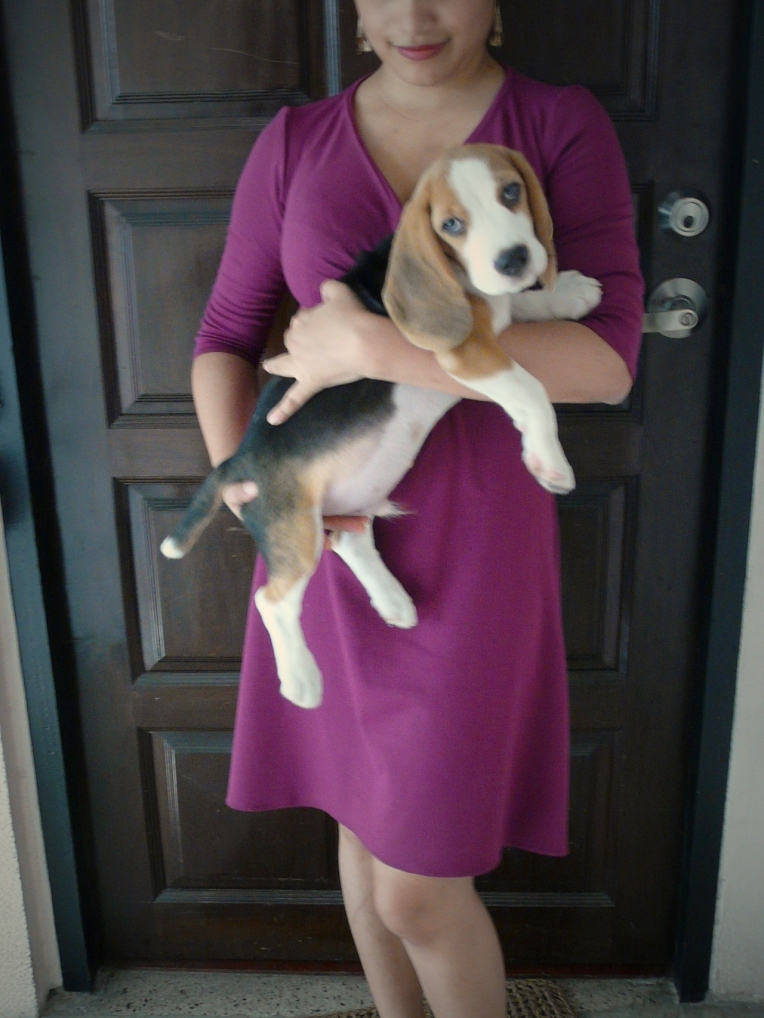
And just for fun, here’s how much the Creature has grown in the five months since I sewed my first Muse Natalie:

P1100154        Puppy 01

Oh dear, he looks quite tubby and stubby in this photo! It’s because his body is squished against mine, pressing it flatter and making it look larger.

And now, I sound like one of those dog parents! But he’s not tubby and stubby, I promise you! Here’s proof:

P1100127

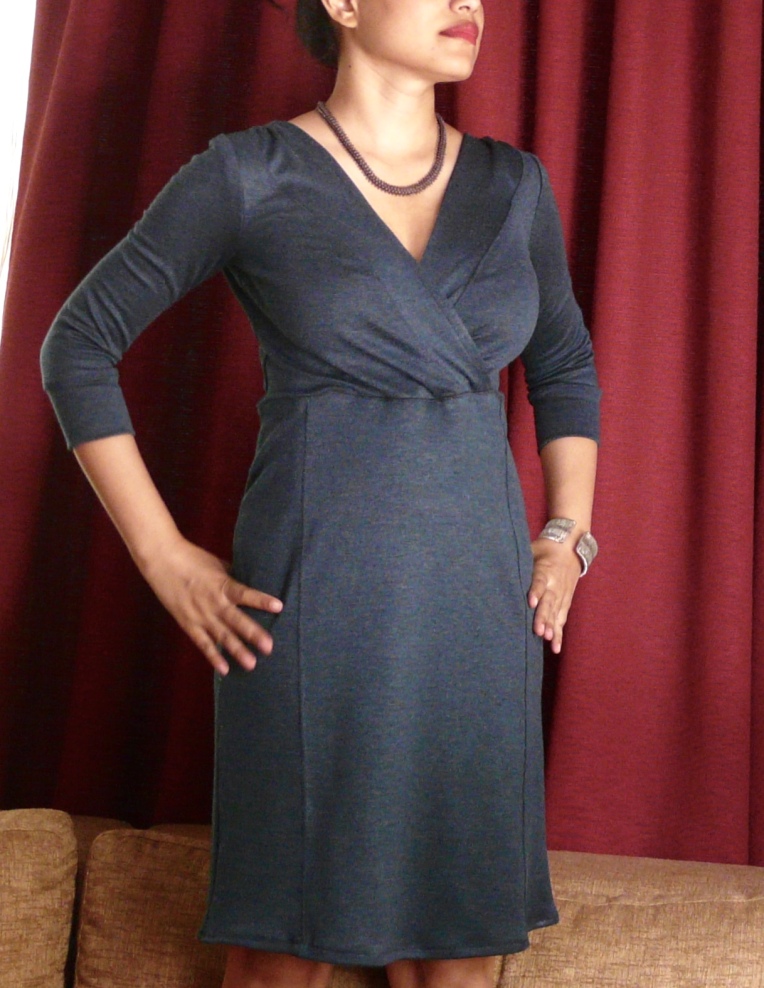
Wren in Navy

P1100101

Colette Wren — DONE!

I haven’t made any Colette pattern since the Dahlia a couple of years ago, because the rather simple stuff they put out since then didn’t inspire me. But Wren, yeah!

Of course I decided upon the version with the panelled skirt. I did have to make some important changes to get the kind of fit I like. That said, there are some issues with the drafting of this pattern, so take note!

Size
Looking at the sizing guide, my bust size put me in XS. But the finished garment measurement on that would give me negative ease of 4 inches! Eep! I know a little bit of negative ease on knits is good, but 4 inches?? I became thoughtful.

Because of my thick waist, I decided to grade up to S in that area. But the finished measurement on that would still give me some negative ease. I became really, really, thoughtful.

Finally, my hips put me back in XS. But the finished garment would still give negative ease of 4 inches! Never! Negative ease in a clingy garment which extends below the hips means butt cupping and pelvic cling and all sorts of other maladies out of the fitting dictionary. I wasn’t going to let myself in for any of that.

Fortunately, I’d sewn my Muse Natalie a few weeks ago, and the ease on that was perfect. Mildly negative in the bust and mildly positive in the waist and hips. So I knew I was on the right track and felt very confident in choosing to go up to M at the hip notch. I did, however, go down to XS again by the hem, to get that shapely look the garment was trying to achieve.

I’m not sure why the pattern has so much negative ease throughout. Perhaps it’s a way of getting the garment to ‘fit’, but to me that seems like lazy drafting. Knits can be shaped, albeit not with darts, and should be, instead of just relying on the stretchiness of the fabric.

Pattern Changes
Back: XS at shoulders and underarm, graded to S at waist. So many reviewers complained that the armscyes were too loose that I simply drew in a smaller one from my Muse Natalie pattern.

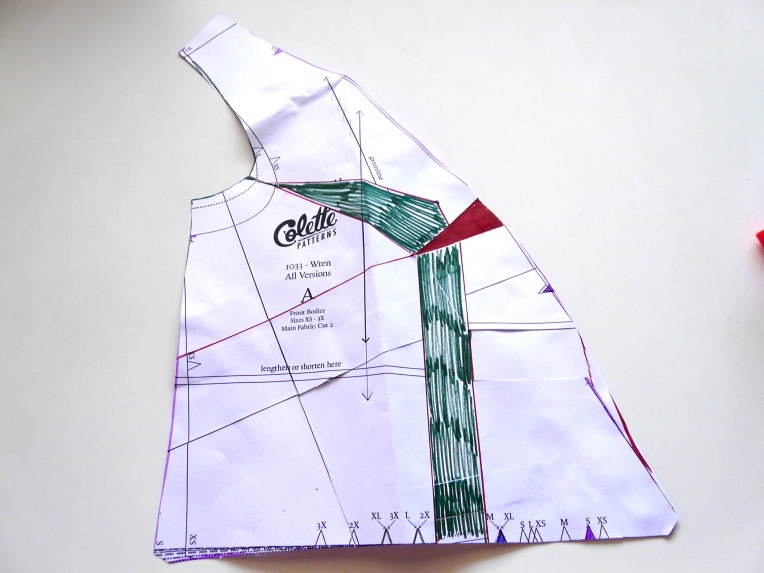
Front: XS at shoulders and underarm, graded to S at waist. I also did an FBA of one inch, so that I gained 2 inches across the whole front and so kept the negative ease of the finished garment to 2 inches (original 4 minus 2 added via FBA). I didn’t remove the extra width added to the waist by the FBA, since I need ease for my tummy. Now, to do the FBA, I had to open a side dart. This I rotated close and moved the excess fabric to the front edge. In the picture below, the green area is the extra width added through my FBA, and the red wedge is the extra fabric in the neckline.
P1100050

Instead of hemming the neck as suggested, I cut a long strip, reduced it by 10%, and used that as a continuous facing all around the neck once the shoulders were sewn.

Also changed the armscyes to Muse Natalie.

Sleeves: Used from the Natalie pattern, with an added cuff.

Back Skirt: S at waist, graded to M at hip and back to XS at hem.

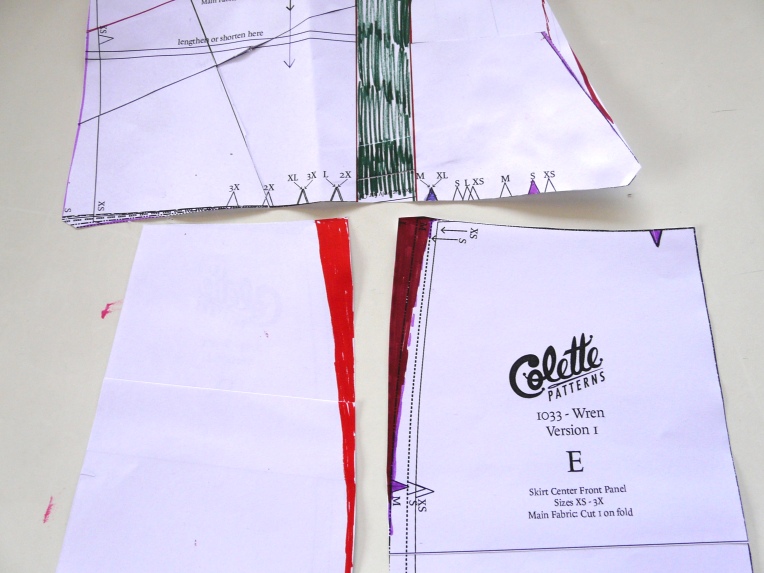
Front Skirt: Ditto above. However, I also filled in the shaping at the top of the skirt panels to make them fit the extra width on the front added via the FBA. In the picture, these extra filled in bits are in red and maroon, and match the green FBA width above them.
P1100052

Sewing
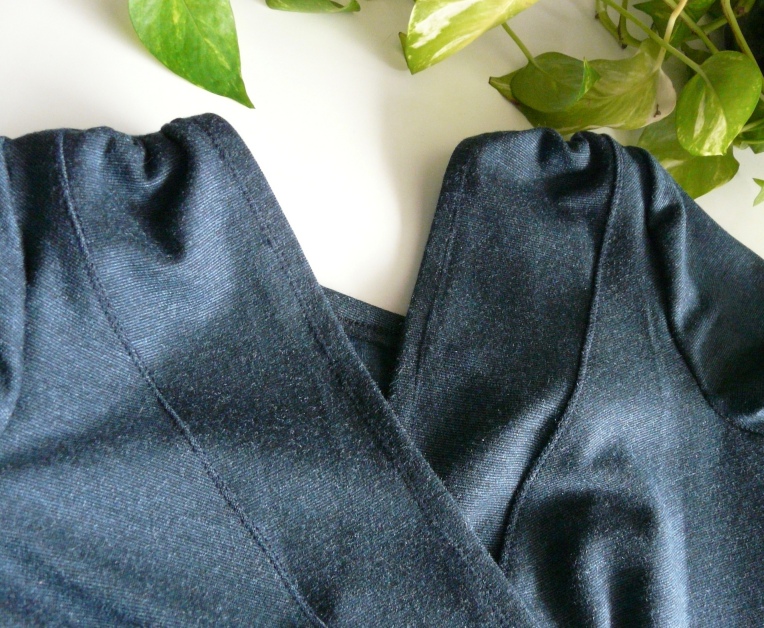
After all that, the sewing was fairly simple. I did all seams with a zig-zag stitch and didn’t need to finish any edge since the fabric was so stable. I also twin-needle top-stitched almost every seam, and love the crisp look!
P1100067

Fabric
Quite a thick, luxurious navy with thin metallic accents. One way stretch only.

Verdict
I really like this garment, especially with my changes. I can’t imagine how clingy it would have been without grading up through the body! However, there are a few things I would definitely change the next time

  • Remove a one-inch-tapered-to nothing wedge from the CB
  • Bring in shoulders for a narrower neck on the back
  • Ditto on the front, continuing the extra fabric all the way to the waist for more coverage.
  • Full bicep adjustment on the Muse Natalie sleeve

If you intend buying this pattern, do be aware that most reviewers have noted problems. The sleeves are very wide and low and practically everybody has had to modify or substitute. The waist is pretty high; I like that, but it’s something to note if you want the dress to hit at your natural waist. The neck finishing is a bit amateurish, and many others have added a facing instead of simply turning it down. And the (in my opinion) excessive negative ease throughout the body is a bit disconcerting.

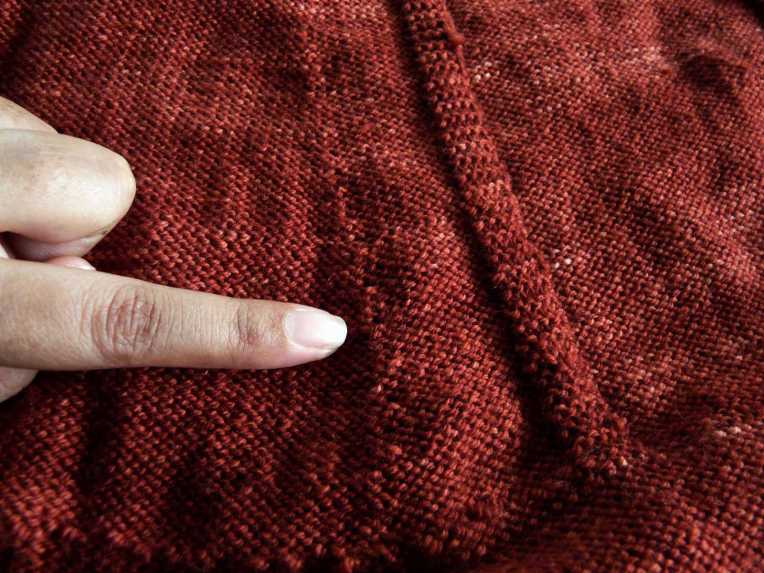
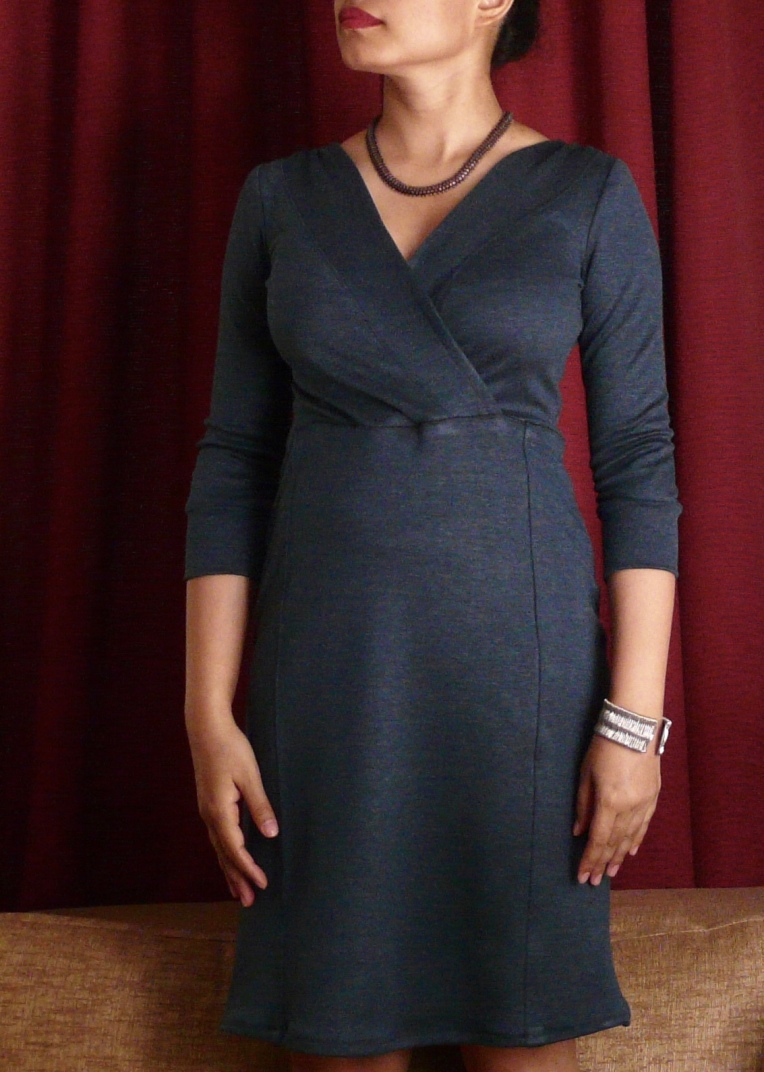
Finally, there are two great eyesores about this dress. First, the wonky hem — this is my inexperience with sewing knits. I’m hoping washing and pressing will sort that out. Second, the hideous, undulating waistline. This is very, very obvious since it’s on the front, and seems to be  a problem in every Wren I’ve seen, caused by the neckbands being kept short to prevent gaping. You can see how the waist rises along the sections where the neckbands are attached.

This means that the Wren pretty much always has to be worn with a belt. I’m thinking of drafting a self belt and incorporating that into the side seam the next time I make it.

Now I don’t mind making adjustments for fit, and certainly don’t expect pattern companies to draft to my specific body shape. Some narrowing and widening to fit my unique body is certainly expected. But I do expect companies charging premium price to ensure that the basic draft is good.
P1100104

Score
7/10. Three points deducted for the undulating waistline, which should have been fixed as a design drafting error! And also for the gigantic original sleeves. But apart from that… I like the pattern and already planning other versions; perhaps one in a thin, copper coloured knit with flutter sleeves? How tantalizing!
Shameless Product Association

About a month ago, I had thought I’d left my knitting mojo loss behind. I was going to cut, knit, sew, create! A million, million things before the year ended!

Oh dear. We got a dog. And then came a month of full on utter exhaustion. I now know what new mothers feel like, except I’d like to point out that newborn humans cannot walk and run and chew everything. What’s that you say? Human babies have opposable thumbs and can get into even more trouble? Time to throw down my trump card: human babies can be diapered.

Anyway, the brat did take a nap or two:

20151208_084255

During which I managed to cut and sew myself a Muse Natalie dress.

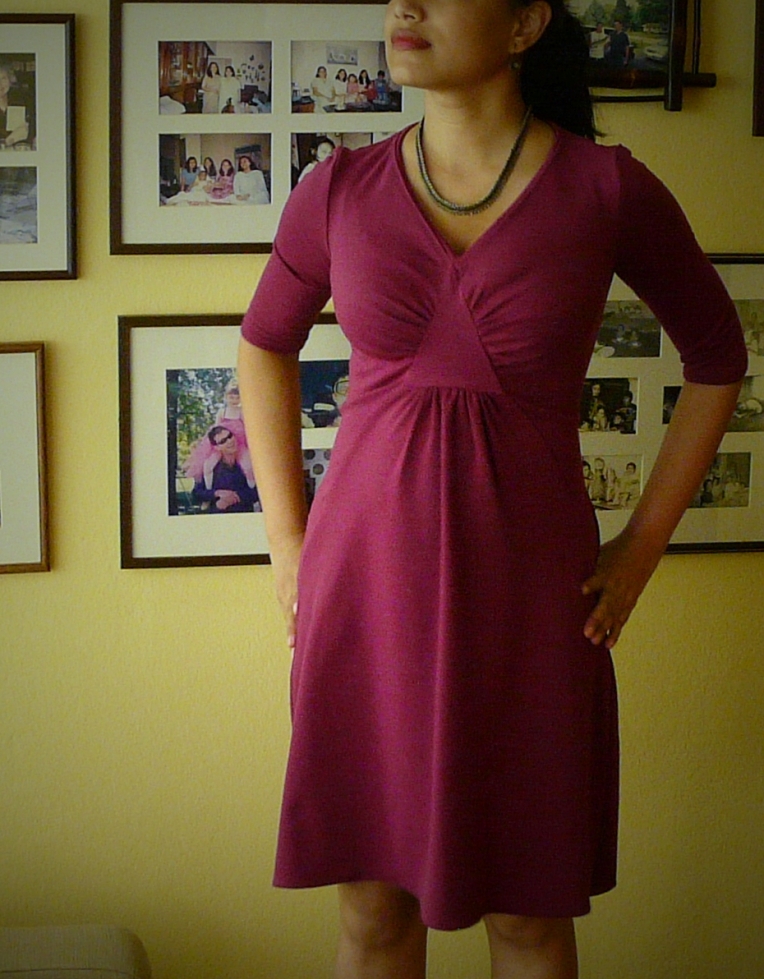
01 Front

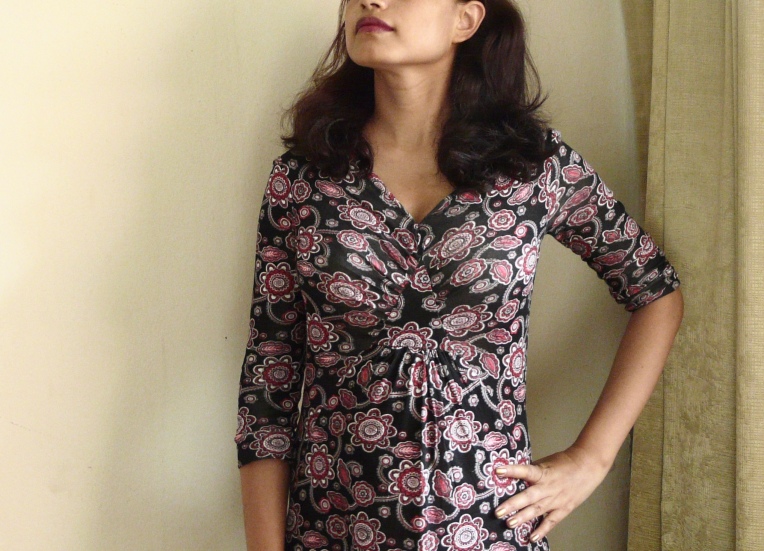
I cannot say enough good things about this pattern. The instructions were clear, the result is flattering and I love the fact that level of ease built into each part of the pattern was just right for knits: mildly negative for the bust area, barely positive for the waist and a little more positive in the hips. It hugs the body in all the right places and gently skims over where you don’t want  any cling.

I cut the second size throughout and only faked an FBA by cutting the front piece in the third size in the bust area and grading down to a size lower by the time it reached the hips. Instead of interfacing the centre triangle, I basted it to a piece of woven fabric cut the same shape. With no access to a serger, I sewed seams with a narrow zigzag and finished raw edges (though they didn’t really need it) with a wider zigzag. Everything looks fine from a distance; close up some seams are a bit wonky, but since this is my first proper knit garment I’m not beating myself up!

Next time (oh yes, there will be one) I’ll make the following changes:

  1. Add a little more length to the front skirt, in the centre only — it rides slightly high now.
  2. Make sleeve caps a little less tall, since they seem to poke up a little.
  3. Leave out the waist ties, don’t really need them.
  4. Cut 3/4 sleeves longer than the given pattern length, or add cuffs.
  5. Cut the overall length at the given dress length so I can fold up a more substantial length; I cut this one about 3″ shorter and it is a bit too short now.

As promised in the title of this post, a shameless attempt to make my dress look even cuter through product association:

Puppy 01

(Yeah, he’s always blurry. And already I’m thinking: He’s grown!! Where’s the toddly little thing I had last month?)

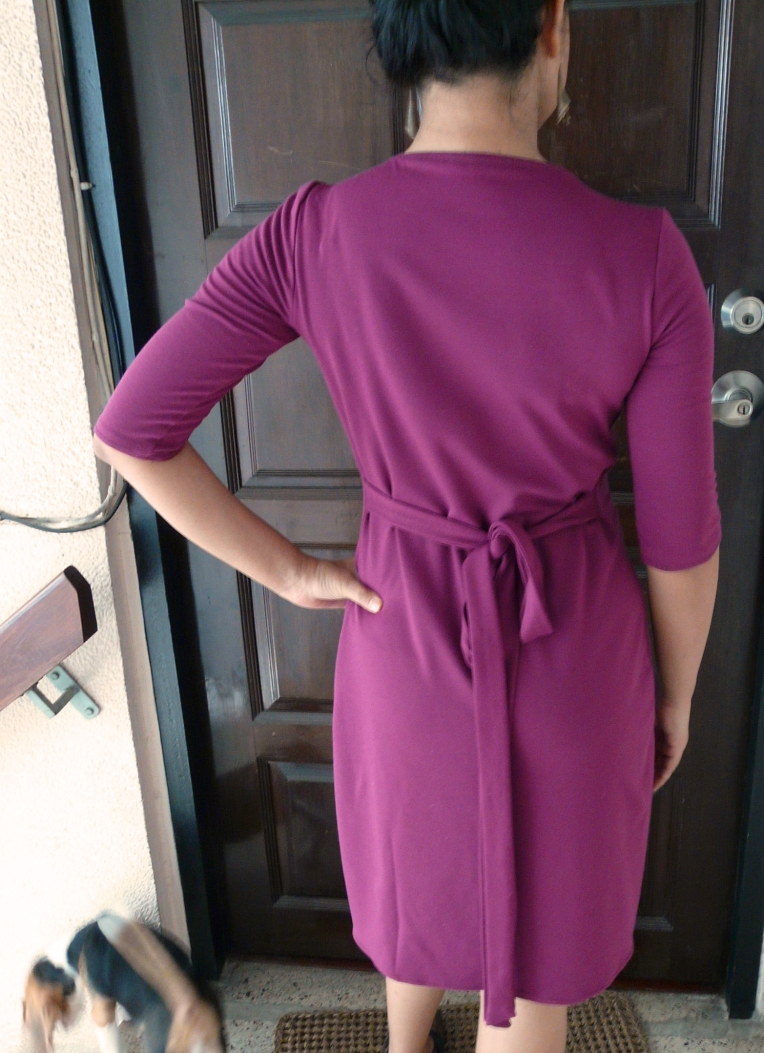
This is the back (with obligatory photobombing by the creature):

Back 01

The fabric is a nice stable-ish cotton jersey and I love that I now have a great, basic, neutral dress! I know bright magenta doesn’t read as ‘neutral’ to most people, but in the context of my wardrobe I’ve decided to define neutrals as ‘serving as background to show off my handknits and jewellery’.  And that’s it, really!

02 full

Victorious

During my no knitting phase, I tried to sew, but everything turned out wrong. I’ve since worked out fixes and will eventually post them, but it was disheartening that I’m still not sure enough of sewing to bend real materials fully to my will; it was frustrating to think processes through meticulously and yet get unpredictable results simply because I didn’t know every factor of that universe.

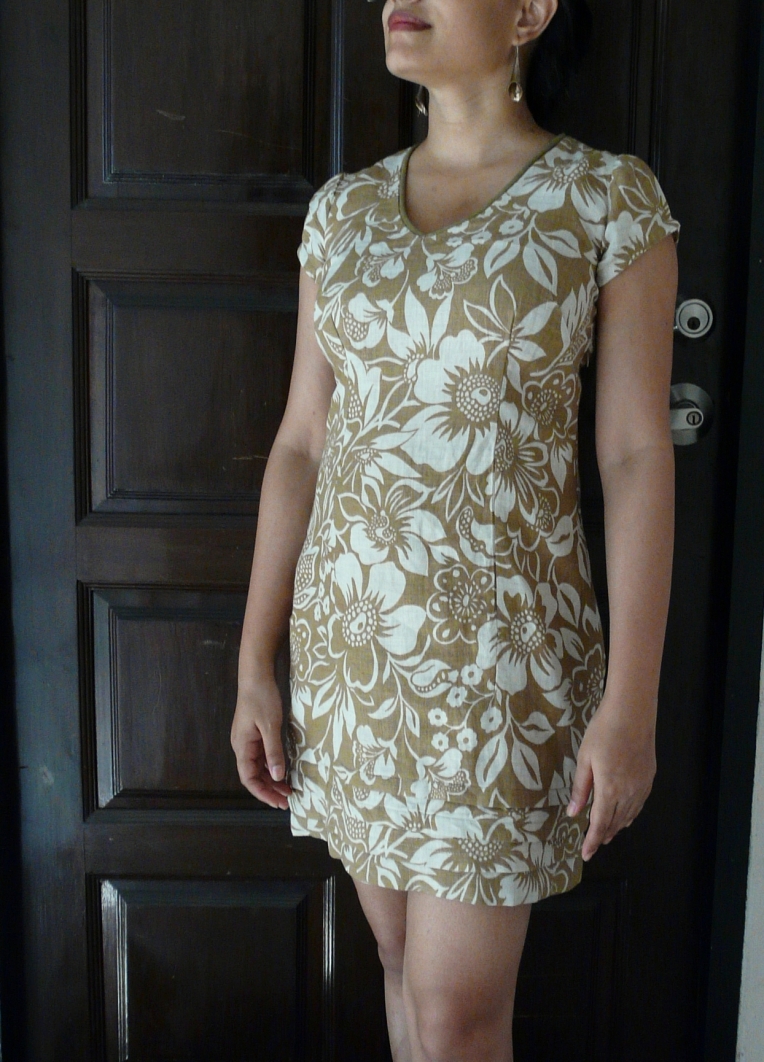
Finally, I picked up an old dormant project. I had used a pretty cream and brown linen, underlined with burnt orange rayon to start a dress over a year ago. Then I attached a creamy lace trim at the neck, tried it on incomplete, hated it because it looked so matronly, and promptly stuffed it into a project bag.

A few weeks ago I took it out, broadened and deepened the neckline and attached thick piping instead. Voila! I auditioned the previously cut sleeves, found them too matronly and decent, then cut them shorter and scooped high (is that the correct term?). I finished their hems with applied bias tape of the same material, leaving them unlined. Double Voila!

front

Finally I made the horizontal pleats at the bottom. They had always been in the plan and I’d left the fabric long at the bottom. I’m so glad I planned them, they add weight and make the dress swingy and fluid. Triple Voila!

The dress is based off my ancient, much modified, sloper which was the basis for several tops. To turn it into a dress I just extended the hip lines straight down. The underlining really helps to give substance, drape and smoothness to the otherwise crisp and fine linen. And now it’s morphed from matronly to actually being a little too short for work – I’ll probably need some sort of leg covering to wear this at stuffy meetings. But yay for a sewing victory!

Grey Print Laurel

Another Colette Patterns Laurel, a simple little template pattern made a teeny bit unsimple.

small 03

I’d made some permanent changes to the smallest size already:

  • Eliminate the CB seam (so that the piece is cut on the fold) and remove another ¾ inch down the whole length.
  • Deepen and lengthen the darts slightly.
  • Flatten out the back of the sleeve – it was very puffy and rounded originally.
  • Deepen the waist indentations at the side seam and move them by an inch or so.

With these changes, the pattern fits me decently enough, and most importantly, doesn’t require a closure, which is way too much work to install for a simple shift dress. When I’m feeling less lazy, I will probably add an inch through an FBA; it is currently a tad too tight. And lower the bust dart by one inch too.

For this particular dress, I deepened the neckline by 1.5 inches (I should probably make that a permanent change) and added a keyhole with a tie. The sleeves were short to begin with (I was using fabric remnants from a couple of other projects) so I scooped them out even more. They’re now 1.5 inches long at the underarm seam, and about 4 inches from the top of the shoulder.

small 02

Details
Pattern: Colette Patterns Laurel
Size: smallest
Fabric: printed cotton (it’s not quilting cotton, but I don’t know the exact name of this fabric) with lining material used for bias binding.
Time to make: one weekend.

I find that sometimes my life acquires colour themes. Check out the colour of the binding above and my Ondawa: twins separated at birth! And it’s not even my colour in any way!

2nd skein

I’m plugging away at the gazillion cables, but did find time to enjoy the winter sun by shaving a couple of sweaters. Such a soothing and gentle way to pass time! And look at the difference it makes to the two sleeves, below (top unshaved, bottom shaved)!

shaved sleeves

I left the fluff in tree branches for birds to line their nests with, but the last time I checked the ungrateful wretches hadn’t taken any.

Yoked!

I tried out an experiment, and am quite excited it worked!

nov yoke

See, I’ve always wanted to do a proper yoked sweater with tons of stranding. But being top-heavy already, the last thing I needed was a heavy horizontal pattern band across my shoulders. Yoked sweaters are also unflattering on top heavy people since they visually turn the neck and chest area into one giant swathe of fabric.

And then I remembered reading, in this post, that it was possible to make a circular yoked sweater with set in sleeves. Perfect answer! I modified it slightly to make it easier, and solved some problems:

  • By raising the ‘circular’ part of the yoke from across the shoulders to above the shoulders, there is no broad horizontal stroke stretching from shoulder to shoulder.
  • Also, the modified yoke acts as a visual scoop neck, which is really flattering on top-heavy bodies.
  • Finally, the back scoop is raised quite significantly, making the pattern ‘hang’ lower in front than the back, which is quite visually pleasing.

Here’s what I did:

I generated a tunic length pullover in CustomFit. It doesn’t matter what neckline type you choose since that part of the instructions will be ignored.

underarms

I CO provisionally at underbust since I didn’t want the whole sweater flopping around as I worked the yoke. After all bust shaping was over, I worked till the underarm, then BO underarm stitches as usual. At this point, it is a tube (with some bust shaping, not shown) with the green lines denoting the BO underarm stitches.

back shaping

Then I worked short rows on the back, in wedges at the sides (black lines), to raise the sides. On the diagram there is room only to show a couple of turning points, but I actually had 10. While doing these short rows I also did underarm shaping decreases, denoted by blue circles.

Next, I worked the back straight. The white line shows the path of knitting – although I knitted straight rows, I was actually knitting along a scoop since the wedges had raised the outer edges. I continued till the outer edges (yellow line) were as deep as the armhole depth I would need for a regular set in sleeve in my size.

I repeated the wedge shaping on the front. At this point, the back and front were equally scooped (thanks to the short row wedges), but the back had been raised to the correct level. To connect it all into a circular yoke, I counted how many rows I had worked after the back wedges were done (yellow line), converted that into inches, and converted that into stitches using my stitch gauge.

I CO that many stitches between the tops of the front and back, so that all live stitches were in a large circle – back scoop, CO sts, front scoop, CO sts. Then I started my colourwork and finished the neck. I’m pretty pleased by how the yoke worked out, but haven’t yet decided on how to finish the collar. I think I’ll finish the body and at least one sleeve before deciding upon the collar!

Colette Dahlia

Well I’m back. A month of travel with a flight every 2.5 days is awful. Makes you hate planes like nothing else. However, there was a bit of this …

himalayas small

…and a bit of that …

rhino small

…so I suppose there were compensations!

On returning I wanted to make something quick, so it had to be a sewing project. I tried out Colette Pattern’s newest, Dahlia. I used an old fabric from my stash as a wearable muslin, but unfortunately the permanent crinkles in the fabric make the whole thing look rather un-ironed. Anyway, this is experimentation. I’ll try to be brief and organised in the rest of the post.

dress small 2

Pattern Analysis: The Colette pattern aesthetic – vintage, feminine – is one I’m ambivalent about. Most ‘vintage’ inspiration in sewing patterns nowadays (not only Colette) seems to come from the 50s and early 60s, decades whose fashions I find irritatingly cloying. The ultra-saccharine feminine stereotyping of that period just sets my teeth on edge. If I wished to sew vintage fashion, I would seek inspiration from the 30s, when women were expected to be dashing and spirited, and fashions reflected those attitudes. I see the change in attitude over and over again in movies (Indian and western), books and clothes; the fire and spunk of female characters in the 30’s is slowly drowned in syrupy, fluttery femininity by the 50’s . Even poor Nancy Drew did not escape (pdf link) – her spirited, back-chatting character was turned dependent and fearful as the decades went by.

It seems inconceivable to me that modern sewers would choose nipped in waists, gathered skirts, high necks and twee little peter-pan collars over long, lean, elegant lines. But apparently they do, and mine is a lone rant.

And so, when I saw the Dahlia pattern, I wanted it. The high-ish waist and the long vertical panels (in v.2) had potential for grown-up elegance as opposed to prissy femininity.

Looking at the photos, I thought I spotted a scoop neck – yay! Which brings me to a minor gripe I have with most Colette patterns – if they obligingly draft for larger cup sizes, why are most of their necklines high and wide? Why not deep and narrow, or scooped, which are the most flattering necklines for larger busts? Probably because they draw inspiration from those cursed decades, that’s why. And finally, a size zip – double yay!! Centre back zips require way more practice of the Head of a Cow than I’m prepared to do. I always move CB zips to the side anyway, so thank you, Colette, for doing it for me.

Fabrics: I used an embossed self pattern with crinkles, which make the fabric as a whole slightly stretchy. Anyone have any idea what this type of fabric is called? Upon sewing the edges frayed very quickly, so I had to do a sort of reverse flat-fell seam, tucking and folding from the inside. Very tedious! I originally thought the embossed pattern was butterflies, but they turned out to be bows!

fabric small

I made bias tape out of a small paisley print.

binding small

Size: I laboriously measured the pattern pieces to calculate what the garment dimensions would be at several key points. Size 0 at the bust gave me about an ¾” ease so I went with that since the fabric was stretchy. But I graded the waist of the bodice to size 2, and continued with size 2 for the waistband and skirt. The sleeves remained 0, to go with the chest measurement.

Why did I not go straight for size 2? I’ve learnt from my knitting that the key to a well-fitting garment is to get the shoulders correct. Everything below can be increased or decreased, but the shoulders and upper chest are critical, because that is your basic skeletal frame. If I’d gone by my actual bust measurement guidelines I would have made size 4 And everything would be gigantic.

Pattern Changes: I used skirt of v2 with bodice top of v1.

Sewing: I followed most instructions as given, except I inserted a lapped zip, not an invisible one. Narrowed sleeve cuffs and added shoulder darts because cuffs and neckline were really wide. Gathered front more than instructed, to about 4 inches.

Final Analysis: After all the changes I made, I actually quite like the dress. I think this would be great on busty shapes (by busty I mean larger cup size, not just band size) because the gathering allows for an adjustable fit and the waistband highlights the narrowest part of the torso beautifully.

However, there are some things I would definitely change:

a) Narrow the really wide sleeves. Since I didn’t want to mess with the underarm area (which actually fits well) I reduced about 2 ½” at the cuffs (tapering to nothing at the underarm) and added a shoulder dart about 3” wide and 3 ½” long.

b) Look at that neck – I started out thinking it was scooped, but it’s a scoopy, wide V, drat it! The sleeve dart did reduce a lot of excess width, but I still had to gather the front to 4” (as opposed to the 6” recommended in the pattern). And the back neck still gapes a tiny bit. So I would gather the back neck too. And perhaps change the front shape into an actual scoop, not a scoopy V.

c) I will definitely add a lining, if only to avoid attaching zips to several layers of cloth where the outer and inner waistbands, their seam allowances, and the bodice or skirt meet.

d) Reduce the flare of the skirt, to promote the whole long-and-lean aesthetic. Perhaps make it fall straight down from the hip.

PS: on reviewing my post, I’m a bit startled by how vehement I sound in the first few paragraphs. For that I squarely blame vintage inspired patterns with peter-pan collars. The sight of adult women in peter pan collars has deranged me!

Boticelli Tunic

There she goes!

 small boticelli 2

I’m happy with the result, but please, no more fingering weight tunics for a long time.

I’ve documented our long journey together since January: my desire for a striking, lightweight woolen dress; shaping and design elements.

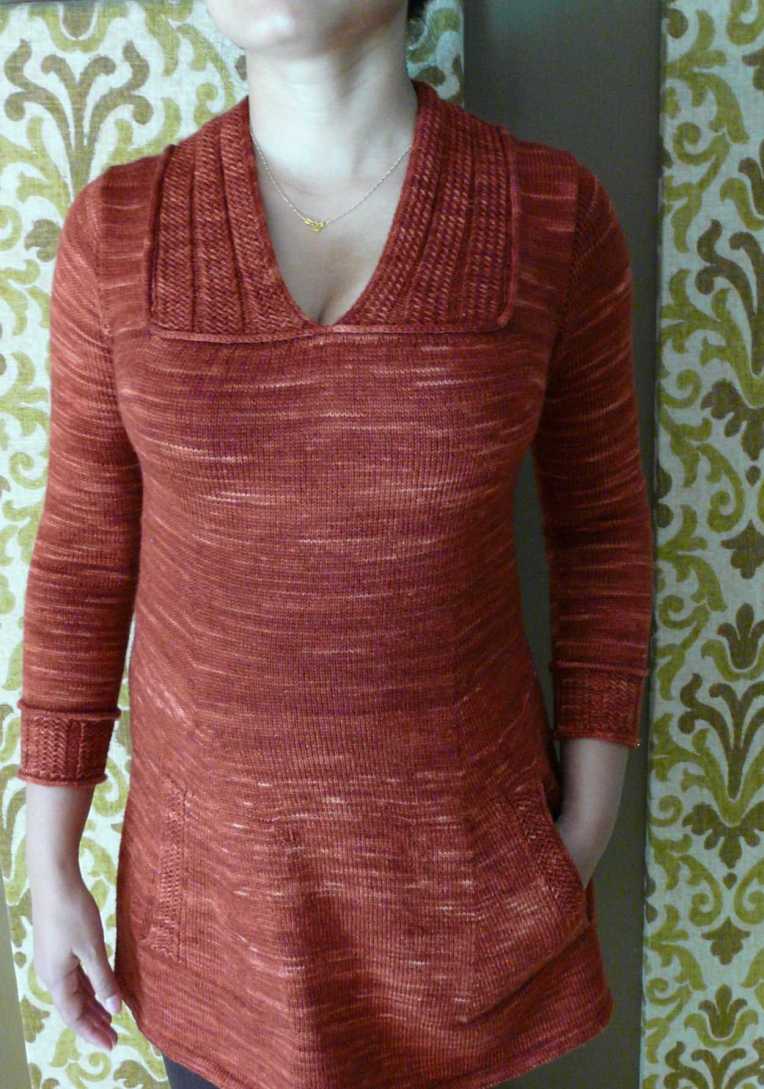
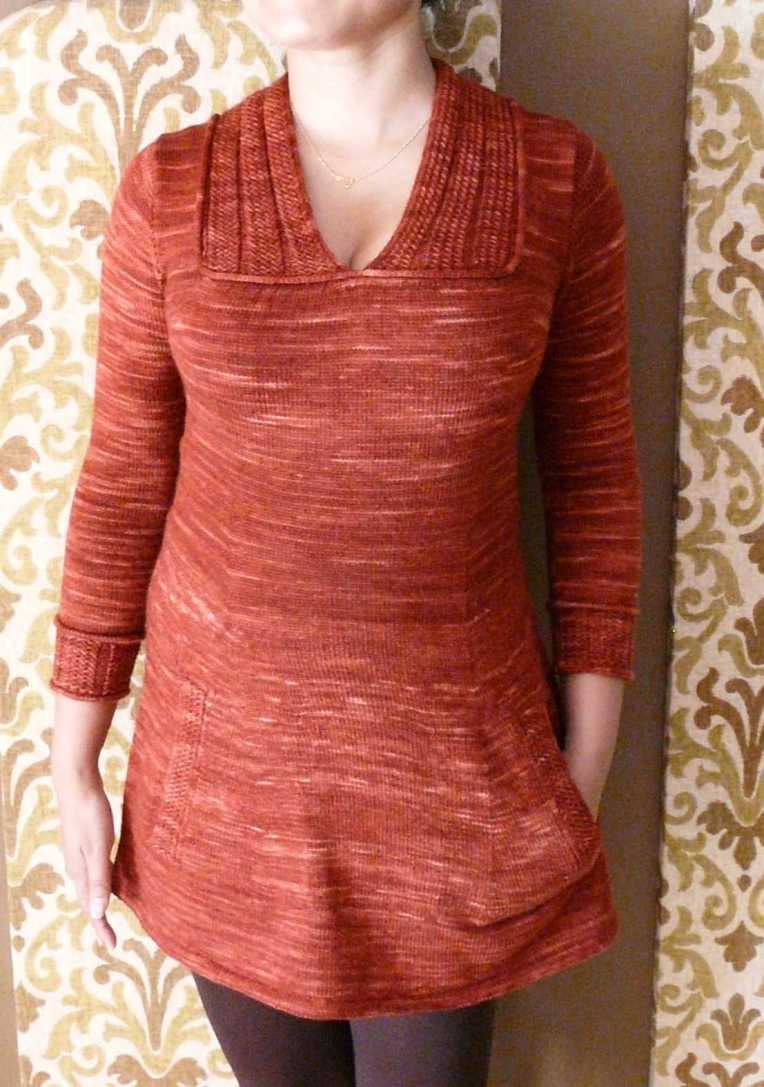
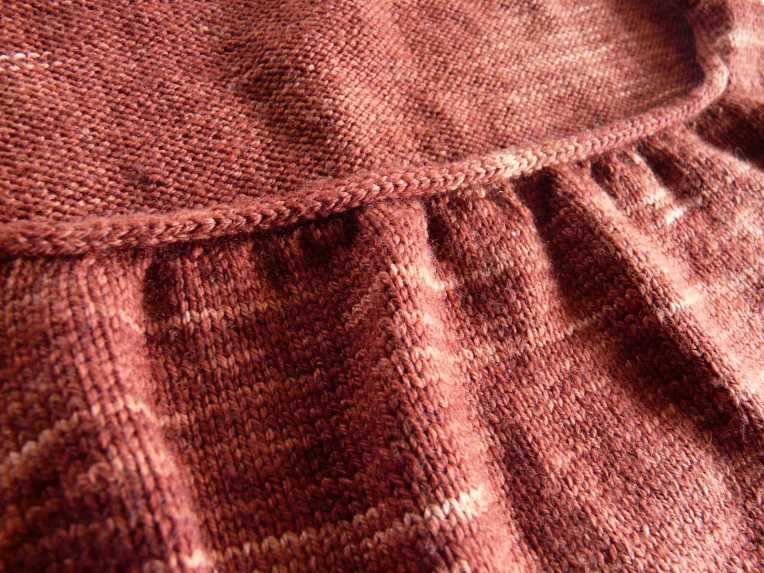
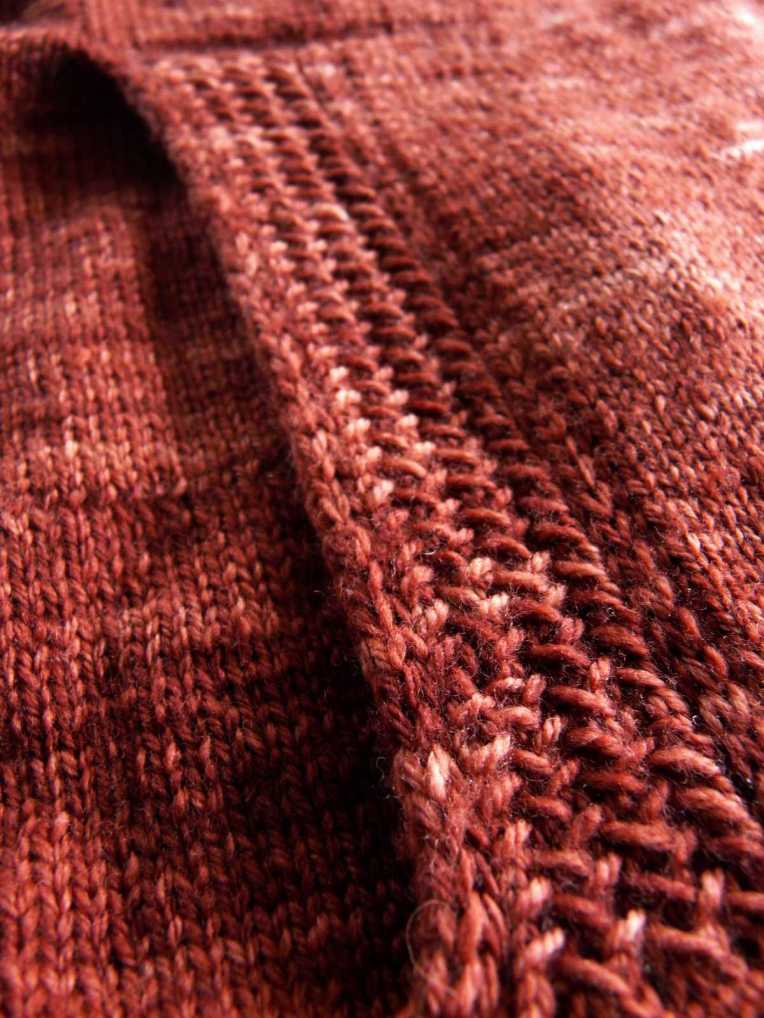
At our journey’s end, a quick summary: tunic length dress; inseam pockets edged with herringbone stitch and i-cord; wide, square neck edged with i-cord; herringbone stitch collar, shaped around the neck with short rows; sleeves picked up from the armscyes and knitted down, ending with a strip of herringbone stitch bordered with welts (to mimic i-cords in horizontal knitting).

There are lots of polished touches I love about this: the i-cord borders, the way the skirt shaping automatically forces the pocket edges to swing out diagonally, the faux seams along the sides.

small boticelli 3

I love the yarn and colour as well, and can’t imagine anything so sacrilegious as using Malabrigo Sock to actually make socks! It is soft and strong, but has an unexpected matt denseness. On the body it feels woolly, but also velvety. Slightly more variegation than I liked, but I can live with that!

Now for the Earth to swing back around the sun, so I can actually wear it!

Details
Pattern: my own, generated with CustomFit; the border pattern is from Herringbone Socks.
Yarn: Malabrigo sock; 100% wool; 402m (440 yds) = 100gm; light fingering weight; 4 skeins in “Boticelli Red”. Just scraps remained at the end.
Needles: 3.0 mm circulars for everything.

Boticelli Details

I finished a marathon session on the Boticelli Tunic recently, determined to reach a significant goalpost – finishing the body. And now, ‘tis so!

I’m going to start the collar and sleeves soon. Meanwhile, here are some details:

Using CustomFit for a Square Neck
CustomFit currently does not have a square neck option, so I started with a scoop neck, the same depth as armscyes. To shape the scoop neck, the generated pattern instructed me to bind off most of the stitches in one row, then a few remaining stitches gradually on each side to shape the rounded edges of the neck.

small neck detail

To make a square neck, the solution was obvious – I would have to bind off all the stitches in a single row and then work the sides of the neck as straight vertical edges. However, there was a small wrinkle (hah!) in the calculations, caused by bust shaping – I had more stitches in front than at the same level of the bodice at the back. And I knew that CustomFit would have dealt with those extra stitches by decreasing them during the scooped neckline shaping, to ensure that the front and back shoulders ended up with the same number of stitches. How, then, was I to know which stitches were being decreased (in my generated pattern) to shape the neck, and which to reduce the extra bust stitches? Here’s how:

No of Back bodice sts at armhole BO row = B
No of Front bodice sts at armhole BO row = F
Ie, total number of extra bust sts on Front Bodice = F-B = E

Initial BO on generated scoop neck pattern = X
Shaping decreases on generated scoop neck pattern = Y
Ie, total sts removed during scoop neck shaping = X+Y = Z

But out of these Z sts, E sts are the extra front bust sts.
So these E sts can be decreased in the row below the square neck BO. The remaining Z-E sts can be BO straight across in the next row.

As knitting instructions this works out as:
On front bodice work up to 2 rows below armscye row.
Decrese E sts along the middle (with my stitch count, it worked out to [k2, k2tog] across the middle)
Work next row straight
BO armscye sts, knit left front sts, BO Z-E sts in the middle of the piece, work to end.
Continue with armscye shaping on each side, keeping neck edge straight. Shape shoulder same as back bodice.

Pocket Construction
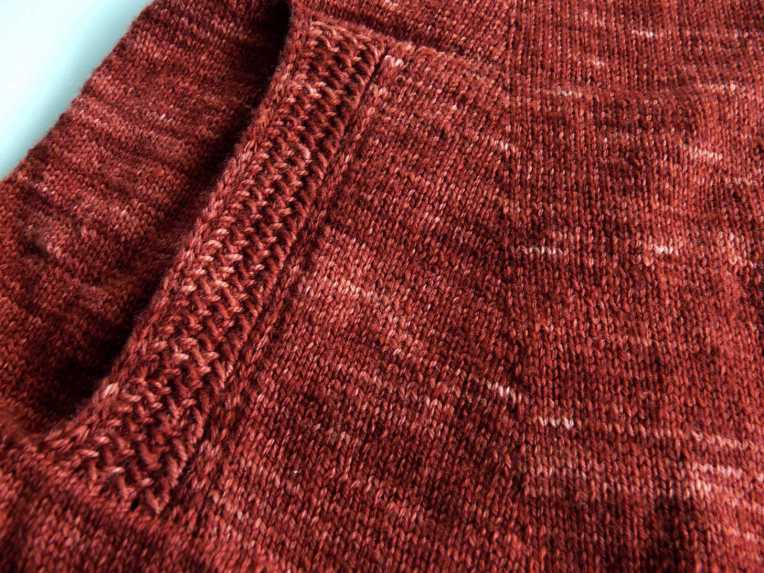
I used my method detailed here, worked in the round. The edges of the pockets are worked in a strip of pattern from the Herringbone Socks, bordered by double knit tubes.

smaill pocket detail

I continued with increases every 4th row to shape the flare of the skirt… and these increases also made the pocket edges swing out  diagonally. Just what I wanted!

small pocket incs

Note that you’ll have to make the same increases on the pocket lining pieces too, to make sure they stay in phase with the skirt shaping.

small pocket back

I feel I’ve been working on this forever. From early January, in fact! But of course there have been lots of breaks, including little bites of something large and chunky to recover from hundreds of stitches in light fingering weight yarn on 3mm needles…

small 03