Fingering Weights

Remember when I culled a lot of sweaters earlier this year? I identified colour and style gaps in my wardrobe, and determined what would be truly useful, reflecting my lifestyle and personal style. One of the strongest needs was for fingering weight pullovers.

So I made four this year, and each one has justified itself by being worn again and again, working with my other clothes, and serving the purposes of form and function.

Here they are, with a couple of outfits I used each sweater in. I hope, by logging outfits each time, I can do a more thorough analysis in a couple of years, but for now, I’m very happy with my knitting decisions!

Thermal Kitten

Natsumi

Arabella

Trika

When You Really Love a Cable

I swatched some of the pretty Debbie Bliss Donegal Tweed a few weeks ago. It makes such a good fabric, wonderfully light, and with that matte integrity that tweeds seem to acquire after blocking.

img_20161017_095022

I’m thinking of a compound raglan pullover, bottom up, the raglan lines marked with — you guessed it — these slipped stitch cables from my last pullover.

image

The sweater is going to be stockinette with lace on the front and shaping on the back only. Perhaps a deep, scooped neck. We’ll see.

I found a lace pattern called “Wolf’s Claw” from an old pattern book, but the text-only instructions were mind-boggling. They were a mad jumble of wrn, fully written out left decreases, and other horrors. So I tried to figure out the lace pattern by electronically annotating over the accompanying photograph:

image

I’m happy to say I got only two rows wrong! Well, actually, the same row wrong twice, since the pattern alternates diagonally.

Now to figure out how to actually knit the whole thing…

Chevron Socks

Still not tired of knitting socks.

image-3

I’m planning to  release these as a pattern for sale. The chevron pattern itself is dead simple and found across time and space, but the sock has some nice little features, like a reinforced heel bottom as well as reinforcing at the ball of the foot. Also, a more anatomically shaped toe than what I usually find.

image-2

Also, testing on these is open! Sign up here if you’re interested!

Details
Pattern: My own, coming  soon eventually
Yarn: Madelinetosh Twist Light in “Thyme”
Needles: 2.25mm
Ravelled: here

Side Ruched Top

Here’s the second top I made using the sloper developed from a Craftsy class.

p1100192

I wrote previously what  a great moulage and sloper I derived from it, and my first garment. I used the same four classes:

1. The Bodice Sloper
2. Creative Darts and Seamlines
3. Creative Necklines
4. Creative Sleeves

Also, it’s amazing how Craftsy drops class prices to such fabulously low levels every few months!

It is a lightweight cotton (I think from one of the giant fabric shops in Nehru Place, New Delhi). I rotated the shoulder, half armscye and side dart into the waist dart, but didn’t use the waist dart since I have a tummy and don’t like to be fitted in that area. Then I split open the (unused) waist dart, and inserted wedges in the outer leg so that it could be gathered back to fit the central leg. I’m a bit bummed that the gathering is kind of invisible in this print, but at least I know it works!

p1100199

I also curved out the bottom to look more like a shirt hem. Also, since I didn’t want to bother with openings, I added 1/4 inch to each side (adding 1 inch ease overall) at the narrowest part of the waist so I can pull it over my head. Without closures, it feels a little snug to pull on, but once on the body correctly, it fits beautifully.

On the back I kept both, the shoulder dart and the waist darts, and extended the shoulder by 1/16 inch, easing it to fit the front shoulder. This provides a nice fit through the torso as well as leaving room for arm movement in a sleeved garment. Because this is a little more fitted than the previous one, I had to account for the horizontal waist shaping dart on both back and front. Since there is no waist seam, I compensated it at the neckline (the class explains how to do that).

The sleeves are short, almost cap sleeves, with gathering at the head to echo the side gathers and scooped at the bottom. Instructions on how to make them from here. I probably should have done facings, but loathe them, so simply added bias facing at the neck.

Now really, look at the fit on this one! I’m kind of stunned I made this, having been used to typical RTW fit, and lack of arm movement for so long! Even though it is a very simple top, it fits so beautifully! The only things I would change next time would be not to add a puff (in addition to the gathering) on top of the sleeve cap. And I should remember to centre prints.

Verdict: very happy! I think I’m actually gaining more confidence to use good fabrics from now on.


Scalloped Tunic

Here’s the first proper garment, made from my sloper! I used lessons from four Craftsy classes for this one:

1. The Bodice Sloper
2. Creative Darts and Seamlines
3. Creative Necklines
4. Creative Sleeves

p1100182

They are all by the super competent Suzy Furrer, and I’m pretty sure I got at least three of them at a 75% discount and one of them at a 50% discount. Excellent value for money!

The fabric is a thin summer cotton (probably from Nehru Place, New Delhi) and I followed  these instructions for the scallops. Seriously, the easiest scallops ever, without needing a million clips before turning.

In design choices, I rotated shoulder, half armscye and bust darts into a diagonal centre front dart (it’s a little invisible in this print, but you may be able to see an inverted V hanging off the neck at the centre front). I didn’t use the waist dart at all. It is fitted till just below the high figure point and then swings out. I calculated how much to add via insertions by seeing how wide the bottom needed to be, to fit in a whole number of scallops on the front and back. I think I went a little overboard though, and will take out two scallops from the whole circumference to recover it from maternity top territory. Luckily, this will be an easy adjustment, just a matter of bringing in side seams at the hem and blending to the existing seam at bust level.

The back has a shoulder dart (because it is sleeved), and the shoulder itself is extended by 1/16 inch and then eased to fit the front, to provide more room for movement in a sleeved garment. I omitted all other darts, and ignored the horizontal waist shaping on both front and back. I didn’t even compensate for ignoring it at the neckline, since it is a loose-fitting garment.

Guys, I am super pleased with this! I am planning to make a series of very simple tops, trying out a couple of new techniques in each. Nothing spectacular, but good enough to lounge at home or walk the dog. I kept this one deliberately loose at the bottom so I wouldn’t have to bother with closures, but it is intended to be well fitted from the full bust upwards. And it is! And look at that sleeve — it is the first draft, calculated off my garment sloper, but no drag lines! I think the sleeve cap could stand to be s-l-i-g-h-t-l-y less puffy, but that is the only fault I can find with it. Everything is well fitted, and yet arm movement is easy. I’m hooked!

I’m planning to make a few of these casual things to perfect the fit, trying new shaping methods and sleeves, before venturing into my expensive fabrics. For my next top, I’m going to keep the waist more fitted.

Verdict: very happy with this nice little tunic!

As Beautiful As I Imagined It


It is done! I think this is my most well travelled knitting, started in London, knitted in Bangkok, finished in Johannesburg and photographed in Nairobi. It is everything I imagined it to be, elegant and casual, warm and light. And beautiful!

image

I wanted a non-baggy drop shouldered pullover, with gentle side shaping and a hi-lo hem. With saddles starting at the  shoulder …

image

…and running down the sleeves.

image

I’m planning to write up a pattern eventually, so watch this space if you’re interested!

Details
Yarn: Lana Grossa Chiara, 7.5 skeins
Needles: 3.0mm for ribbing; 4.0mm for the rest (held lever style for effective needle size of 3.5mm)
Ravelled: here

The Vision of a Pullover

I’m joining in the #fringeandfriendskal2016, are you? It’s the first time I’ve ever done a knit-along, and it came about because there is absolutely no pressure. There is no specified pattern, yarn, or designer, no Ravelry group or email list to sign up on, no pre-conditions of swatching. In other words: my kind of knit-along. I may have just mentioned here and there that a demanding job requires my knitting life be exactly the opposite. As soon as there are conditions attached to any knitting, I lose all interest. So this KAL is perfect! As long as it’s a sweater, worked top down, within the time frame, it’s a valid entry. I’m in!

What I really love about this particular KAL is the little condition that no existing patterns may be used. Knitting allows so much creativity and scope for customisation, it always dismays me to read of others who are too intimidated to modify a pattern. It’s just yarn! Make it do what you want to do!

Although the KAL does not allow an existing pattern, it certainly doesn’t dissuade you from having a plan — as detailed or on-the-fly as you like. Here’s mine:

Concept
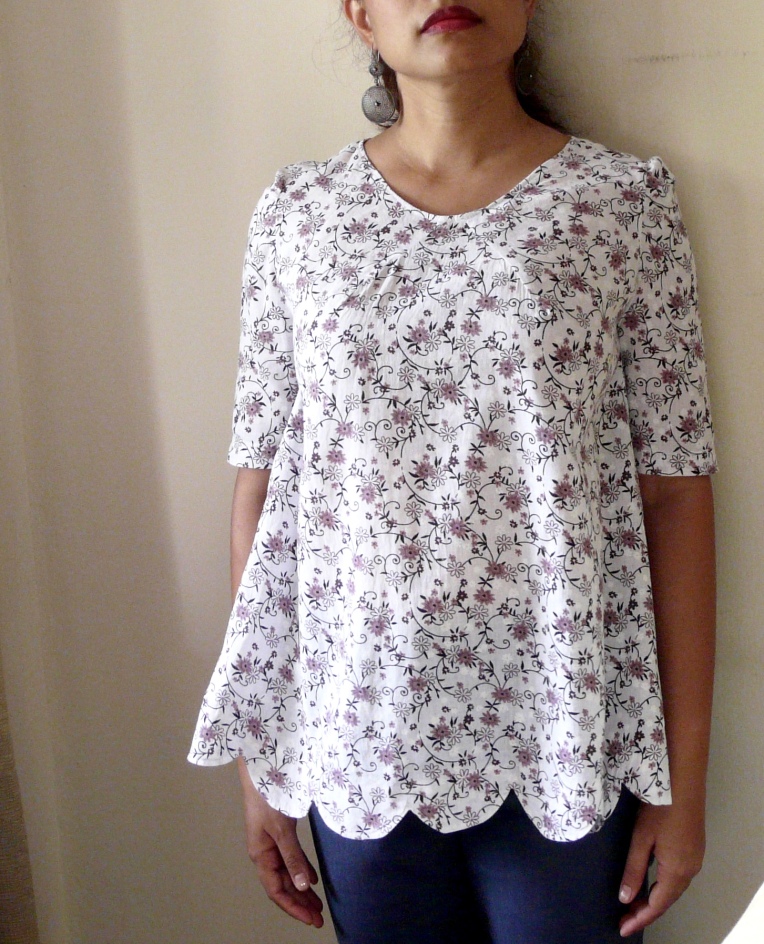
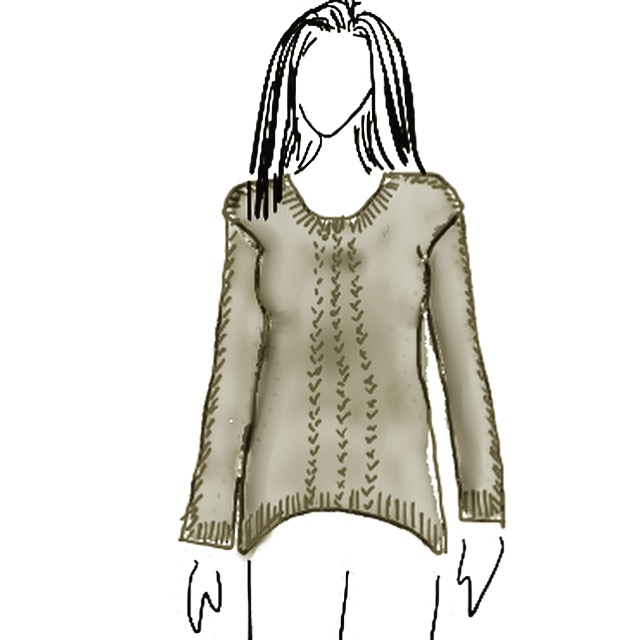
I wanted an elegant pullover, with subtle patterning. Something neutral enough to wear incorporate into my existing wardrobe of colour, but not so boring that it looks like it came from RTW. Most of all, this needs to be a working sweater, not matter how beautiful, hence long sleeves (because if it’s cold enough for me to need woollens, it’s cold enough to need long sleeved woollens) and a scooped neck (I’m busty).

image

Yarn
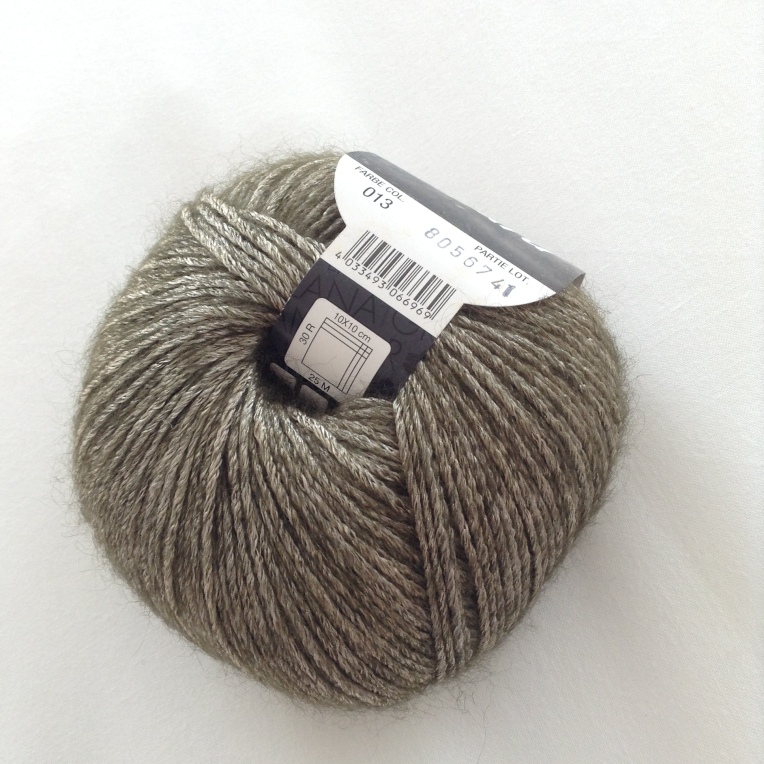
Longtime readers will know that I love colour. Although I am (grudgingly) ceding to the need for a few neutrals to tie my colourful items together, I still cannot bear to wear a neutral colour, in a basic silhouette, which is also unfitted. Something’s got to give, and in this case it was the yarn. Yes it’s black/grey. But what a black/grey! A core of molten, metallic rayon, surrounded by a halo of mohair. It’s fluid and supple, yet warm and cosy. It’s good for winter parties and work meetings. It’s plain enough for the day but special enough for evenings. Basically, it’s perfect. (It’s also my first yarn love and the reason I joined Ravelry).

image

Design Details
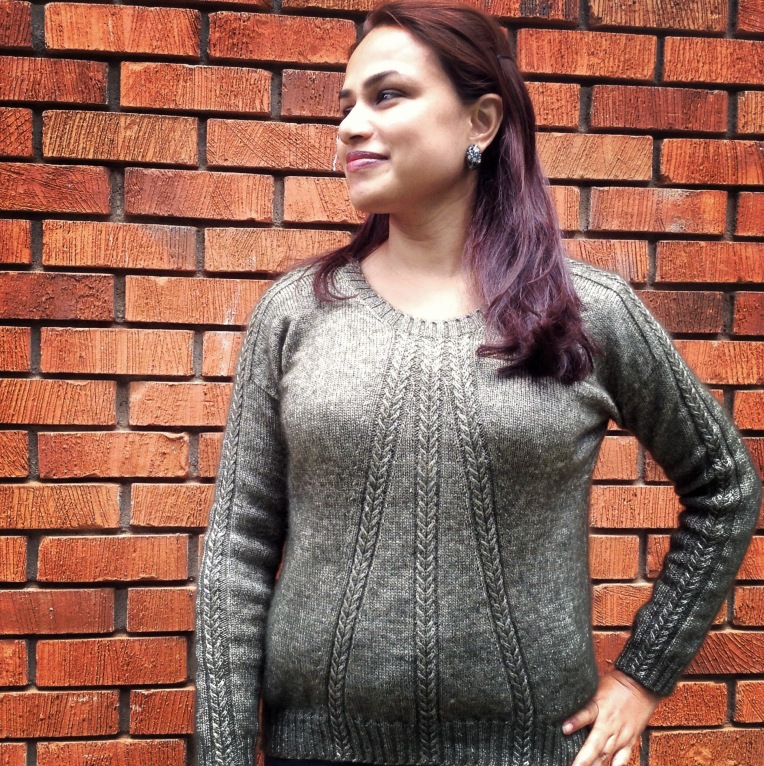
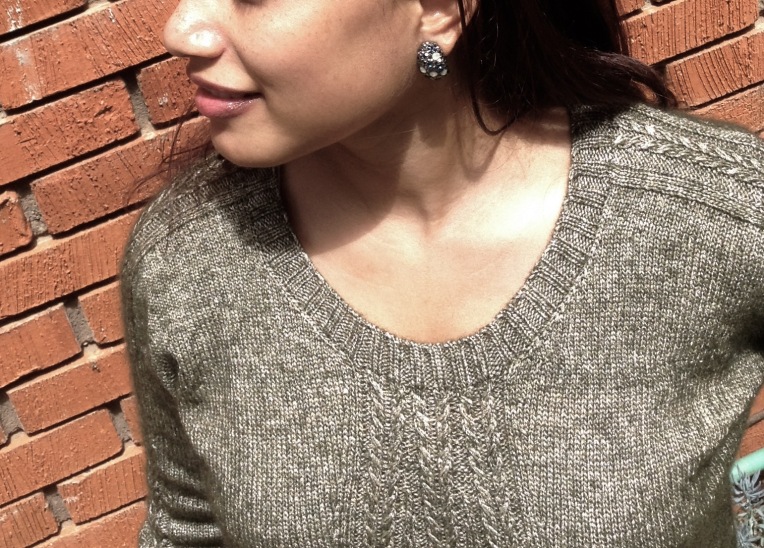
I love modern dropped shoulder silhouettes. No ugly, bulky, 80’s shapes here — the fabric is drapey, shoulders are shaped and drop only a little bit past the shoulder, the neck is scooped, the sides are slightly flared and  the hem is hi-lo. It is, in fact, to the exact dimensions of my Natsumi which fits perfectly, but this one is worked top down instead of side-to-side.

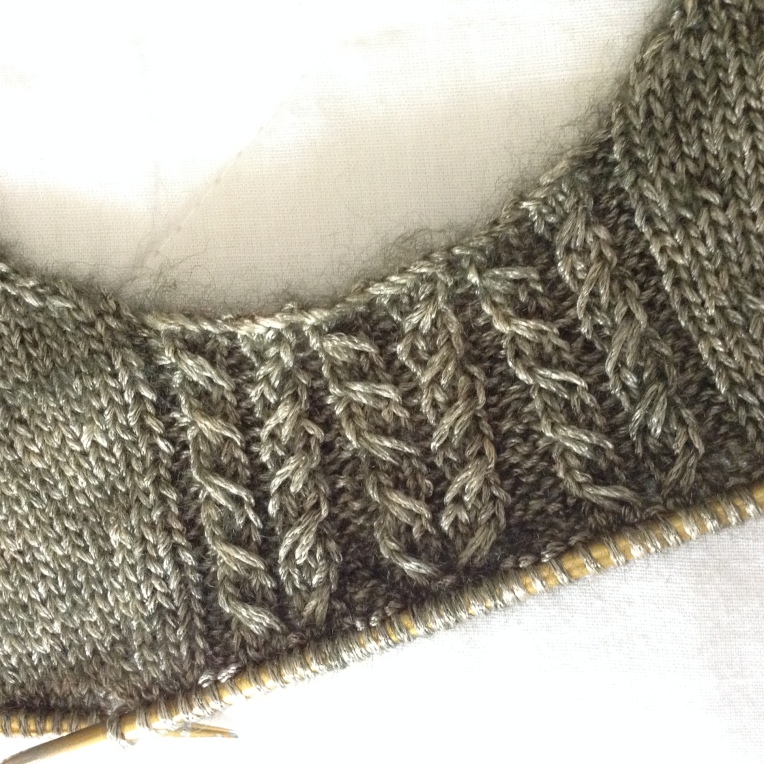
But a stockinette sweater still looks un-special, so there will be three narrow cables down the front, spreading apart gently. And once I’d decided that, how could I not have narrow saddles, with the same cables running from neckline to cuff?

Secrets of Structure
All great knits have structural secrets doing behind-the-scenes heavy work, while still looking effortless. Like gymnasts. Or great underwire bras. Or cantilevered bridges. My sweater will have:
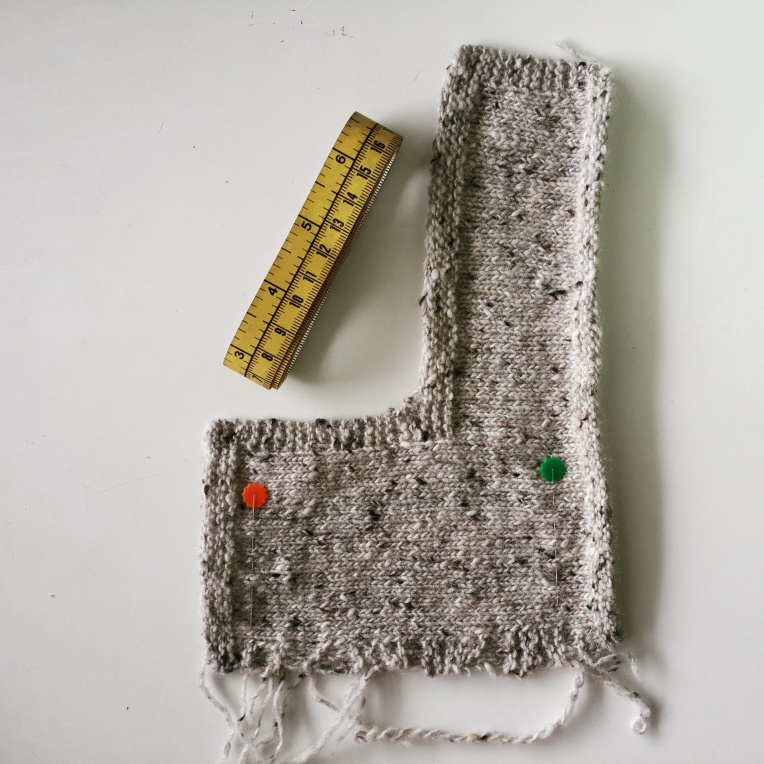
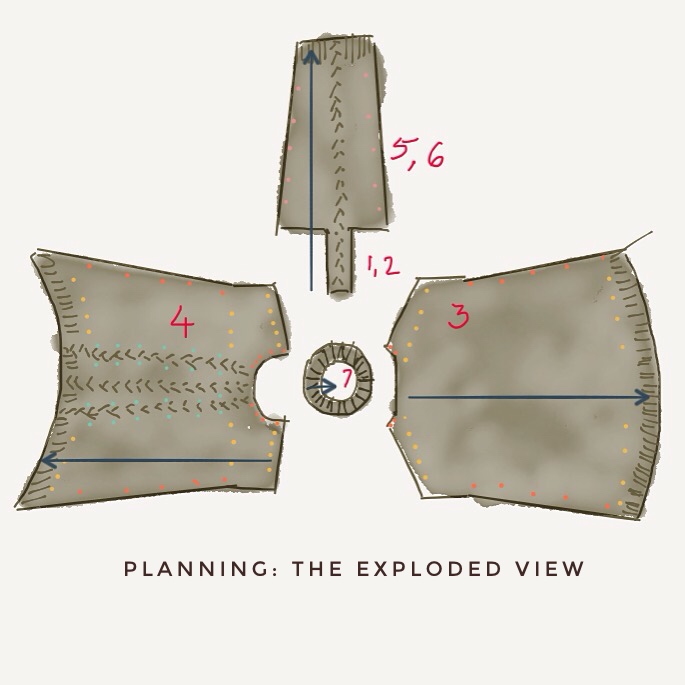
Increases, decreases and increases on the front. One set of paired increases and decreases will rapidly widen the triangular wedges between the pattern strips, without changing the overall stitch count. Another set of increases will gradually widen the sides, to match the back. In the exploded view below, the turquoise dots show the paired increases and decreases that separate the pattern strips. All orange dots show increases to shape the sides and neck openings.

I thought of having a single set of increases  on the front do the double duty of widening the triangles and forcing the sides out to match the back, but was stumped by my deeply scooped neck which had a very small flat area at the bottom of the ‘U’. Barely 20 stitches, which was not enough to contain the pattern strips and their separators. So my pattern strips start out with only a single purl stitch between them, but rapidly acquire knit and purl separators; matching decreases ensure that the stitch count does not change. Meanwhile, the sides slowly flare out matching the back.

The pink dots along the sleeve seams show shaping decreases.

So many short rows. This is meant to be hi-lo, not ridiculously-hi-somewhat-lo. So there will be bust shaping short rows to add length to the front only, just below the neck. Yes, right there on the front with the two different rates of increases and decreases going on already. All the short row points are yellow dots: they shape the shoulders, curve the front and back, and add extra length to the front only.

Tubular BO. Because binding off ribbing in pattern is just ugly.

image

Knitting Process and Direction
1. and 2. Work saddles, centering a single pattern strip on each.
3. Pick up and knit one back shoulder, short row to shape. Increase for neck. Repeat on other side, CO stitches for the centre of the neck and join to other shoulder. Work down with increases and short rows.
4. Do the same on the front, except keep track of way more things.
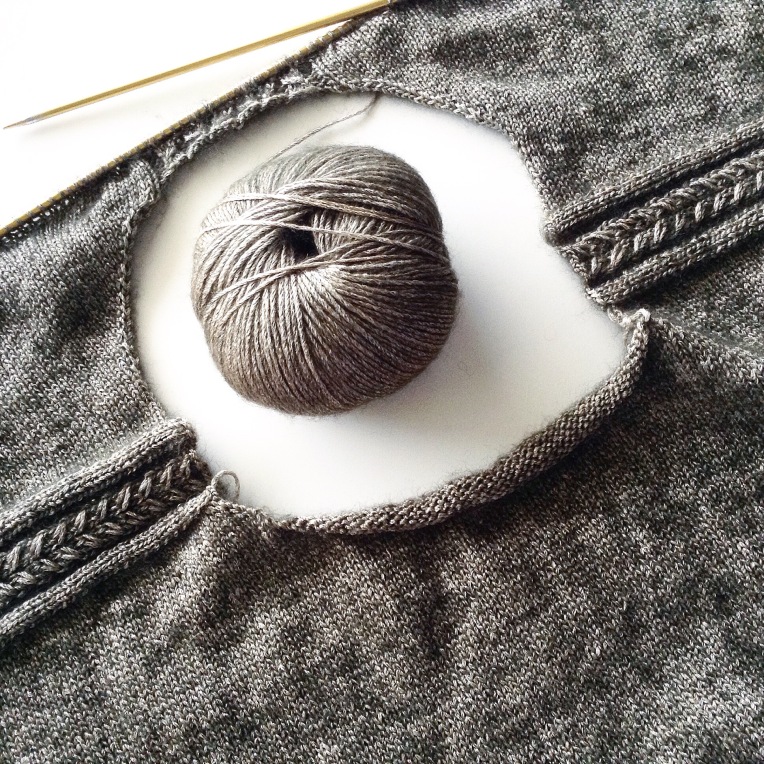
5. and 6. Pick up stitches from back, knit across saddle, pick up stitches from front. Work to cuff with shaping.
7. Pick up and knit stitches around neck, rib for a couple of inches.

Of course, pretty pictures aren’t much help in the actual knitting. Here’s what the hardworking diagram looks like, before being converted to actual stitch counts:

image

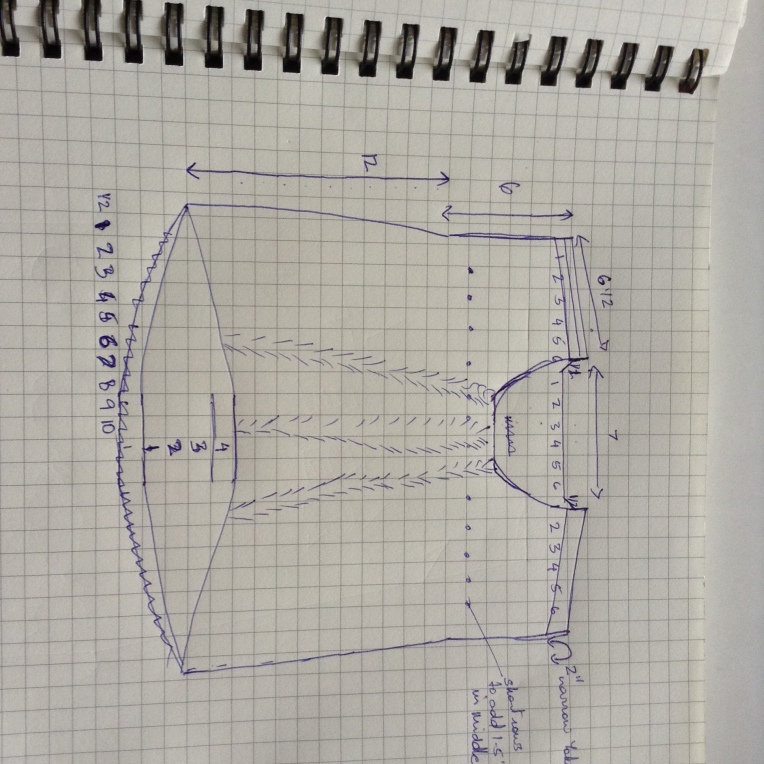
Whew, better return to the knitting!

Gulls and Stones

Having learnt my lesson with the Show Off Stranded Socks — that Madelinetosh Sock, 2.25 needles and my hands create socks that can tightly encase my legs only at  60 stitches or less, I decided to cast on 64 stitches, but decrease more rapidly down to 56. Even that didn’t work! So I ripped out the couple of inches I’d knit, and started again with 56. Much better.

2016-08-06 13.14.36

I worked in garter rib for an inch or so, then started the pattern repeat. As I was knitting, I felt growing frustration at how slow it was. Compared to the other socks it seemed to be crawling along. And then I realised that due to the slipped row, I had only 3 rows growth for every 4 rows worked. No wonder it felt slow!

So I ploughed on, continuing the beautiful gull pattern down the heel flap. I know this is sock heresy — everyone says that the heel flap has to be especially reinforced — but I’ve never had my flaps wear out. I’m far more likely to get holes at the heels and balls of the feet, so that’s where I reinforced the fabric with the eye of partridge stitch.

2016-08-06 13.16.56

I do feel my sock knitting mania beginning to subside now. It’s as if my dpns are telling me they’re getting tired, where earlier they were raring to go. I do think I’ll crank out one more pair, in colourwork, no less, before I make a final decision.

I’m really in love with the colour, though! I bought the skein because this colour was going to be discontinued and so I got it at a slight discount.

2016-08-06 13.18.46

Details
Pattern: my own, adapted from Paul Atwell socks
Yarn: Madelinetosh Sock, 0.67 skeins, “Ginger”
Needles: 2.25mm dpn
Ravelled: here