My last shirt making adventure still lies incomplete. I could sense something was off but didn’t know how to fix it. And that is frustrating! I’ve become so used to knitting garments that fit me, it’s a shock each time I sew to realise that it’s a new skill, at which I’m actually not so skilled!
My frustrations were chiefly with the enormous amount of ease in the pattern (Sew U – Wendy Mullin). The darts were placed more-or-less correctly on my pattern size, indicating that it was meant for someone with my frame, but that ease! Six inches or more of fabric flapping around!
Last time I made some attempt to reduce the expanse, but the fit ended being not quite right. Before starting again, I made a mental list of what I would have to do. Reduce back width, avoiding darts, but what happens to the darts then? Should I use those to reduce the width? But then, the shoulders will remain wide and if I adjust them what about the armholes? And on the front, how do I change the width without making the darts point in all the wrong directions? But wait, don’t I have to do a Full Bust Adjustment (FBA) anyway? So should I do that first and then reduce the width or the other way round? Aaargh!!
Wait, deep breaths. I’ve already gone through all this in knitting, right? Never being able to get gauge, then deciding to work with my own gauge and calculating dimensions of the original pattern to find how many stitches I needed with my gauge, then realising I wanted different dimensions for my cardigan anyway so why was I referring to the schematic? !
And that, my friends was the Aha! moment in my knitting. From then on, I learnt to capture the essence of a pattern: a lovely stitch, gorgeous cables, unusual construction, unique design element… and fit that into the basic template of my shape. Since then, almost every bit of knitting has been enjoyable and ended up mostly flattering.
I suppose the sewing equivalent of that would be to draft my own pattern. But I’m not quite ready for that yet! What I did was to apply the succussful strategies of knitting to sewing.
The first fix: remove four inches of ease. Since the pattern pieces are in quarters (half back and half front), 1 inch needed to be removed from each body piece.
I started with the back, since it’s simpler. I removed half inch from the centre-back line, and from there, measured out to how wide the widest point needed to be (at underarm level). Using that point, I redrew the armscye and side seam, by echoing the existing pattern lines inwards. I changed the neck (which had become narrow with the removal from the CB line)… and that was it! The back was done! I cut it out of this fabric which has woven stripes, so that the grainlines were obvious. Already, I knew this approach was going to work. The back piece looked like something that could fit me, and not my horizontally stretched cartoon self.
At this point, I was steeling myself to tackle the front. I took a break. I thought and pondered. And then, another knitting epiphany struck me. I knit my front exactly like my back, except for added increases and short rows. So my front was just a back, with FBA!
Very excited, I made the FBA to the back piece (Google it, there are lots of good tutorials). I cut the front pieces out, sewed it all together… and it fit!
The only thing left now were the sleeves. I reduced width. Also, when I used the pattern previously, I got ugly diagonal wrinkles across the sleeve cap. A quick internet search showed me that the solution was to increase cap height. So I just drew a taller bell curve, not really bothering to match anything. After all, a cap has to be eased in anyway, so a little bit here and there isn’t a problem.
I tried it on, tweaked the darts a little bit, and there it was. The best fitting mono-sleeved, raw edged shirt I ever owned. I forgot to take a picture in the excitement. Then, I ripped it out, cut it along the final sewing lines, stablized the edges with fusible stabilizer, drew in the darts with a ball point, and declared I had the Perfect Sloper.
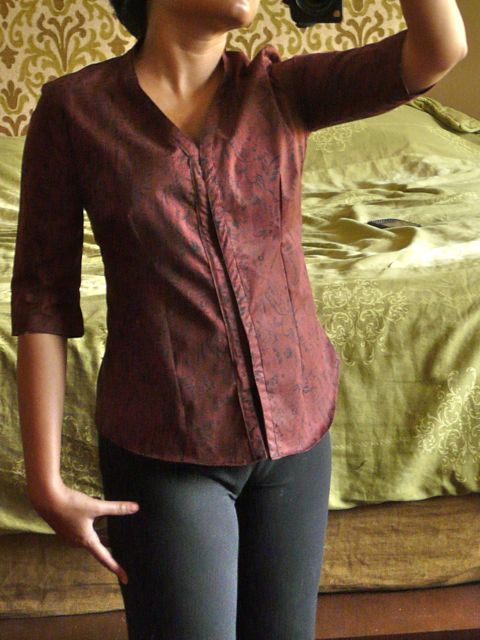
Which got used to make this:
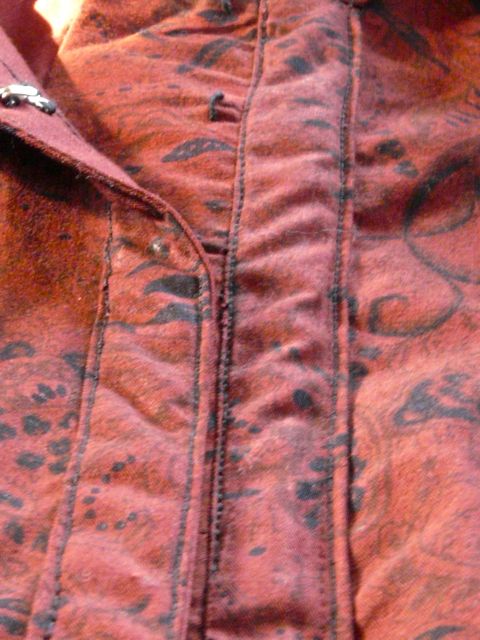
I like, I think. The fit isn’t perfect – far from it – but absolutely better than anything I can buy, since it fits my shoulders without gaping at the chest. I made a V-neck and self facing on top. Since the fronts weren’t wide enough (more on that below), I made sure they abutted, and sewed in a rectangle between the front and facing on the left side. This flap is the home of some neat little hook loops. The hooks on the other side are sewn in before the facing is finally closed, so that all threads are invisible.
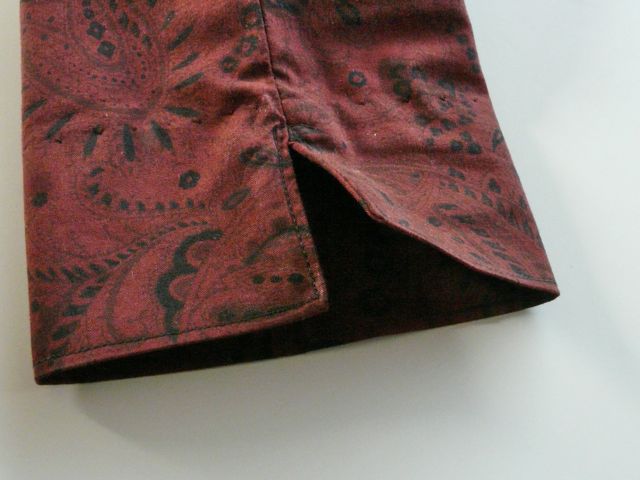
The cuffs have slits. Tutorial here.
Seams are finished by turning the raw edge under and sewing. So much better than zig-zag stitching!
I didn’t use any fusible interfacing for the button bands. All the sewing blogs I’ve been reading despise fusible interfacing, so I shall join the gang and despise away! Anyway, you don’t really need it with a good solid fabric.
And finally, the fabric. It’s a Banana Repbulic mens’ size L shirt. That’s why the fronts only abut – after my FBA, my front pattern pieces were pretty wide and barely fit into the front of the original shirt. And that’s why the sleeves are short. I only had so much left of the sleeves after the cuffs and placket were cut off from the original shirt.
Specs:
Pattern: Sew U Shirt, Wendy Mullin
Fabric: Banana Republic shirt pinched from my husband
Mods: err… see entire post.
Cost: minimal, only for hooks and thread.
PS: As you can see, my camera’s misbehaving in the presence of red, again!


Excellent job – I have been intimidated by the straight visible seams on shirt, but you tackled it beautifully, and I love that it was still a shirt in its previous life!